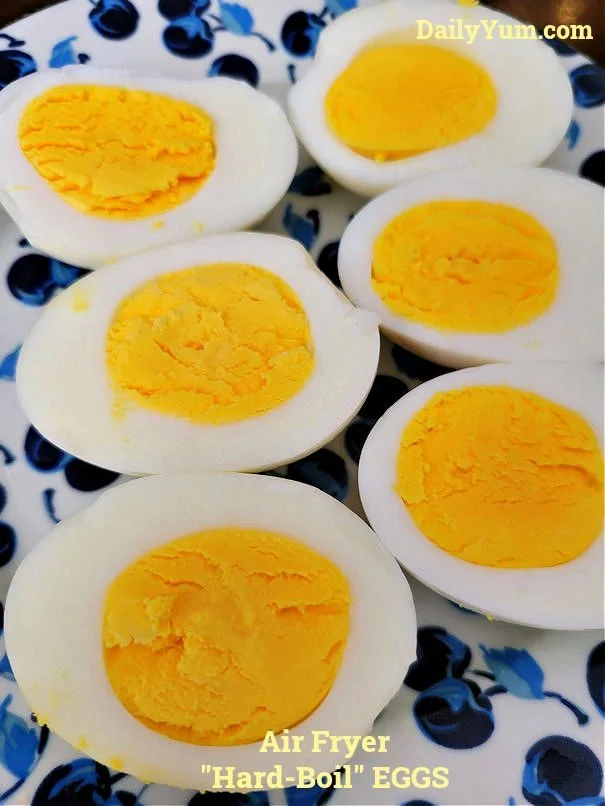
Hard-boiling eggs in an air fryer sounds strange at first, but it’s actually easy, consistent, and mess-free. No boiling water, no pots, and no babysitting the stove.
This guide assumes you want fully set whites and firm yolks with no gray ring and easy peeling.
WHY USE AN AIR FRYER?
No water required
- No pot to clean
- Very consistent results
- Works even if you forget about them briefly
- Ideal for meal prep
The air fryer essentially bakes the eggs in their shells, using circulating hot air instead of boiling water.
INGREDIENTS
- Eggs (as many as fit in a single layer)
- Large eggs work best
- Cold eggs straight from the fridge are fine
- Ice
- Cold water
That’s it. No oil. No salt. No vinegar.
EQUIPMENT
- Air fryer (basket or oven style)
- Tongs or spoon
- Bowl large enough for ice bath
- Timer
STEP 1: PREPARE THE EGGS
- Take eggs directly from the refrigerator
- Cold eggs are okay
- Room temperature eggs also work, but timing stays the same
- Inspect eggs for cracks
- Discard cracked eggs
- Hairline cracks may leak slightly but are usually fine
- Arrange eggs in the air fryer basket
- Single layer only
- Do not stack
- Leave small gaps for air circulation
STEP 2: AIR FRYING TEMPERATURE & TIME
Standard Hard-Boiled Eggs
Temperature: 250°F (120°C)
Time: 15–17 minutes
- 15 minutes → fully set whites, slightly creamy center (no liquid)
- 16 minutes → classic hard-boiled
- 17 minutes → very firm yolk, ideal for deviled eggs
If your air fryer runs hot, start with 15 minutes.
STEP 3: COOK THE EGGS
- Preheating is optional
- If you preheat: 2–3 minutes at 250°F
- If not: add 1 extra minute to cook time
- Place basket into air fryer
- Set timer based on desired doneness
- Let eggs cook undisturbed
-
- No shaking
- No flipping
- No checking mid-cook
You may hear slight ticking sounds — that’s normal.
STEP 4: PREPARE THE ICE BATH (CRUCIAL)
While eggs cook:
- Fill a large bowl halfway with ice
- Add cold water until ice floats
- Keep bowl near air fryer
The ice bath:
- Stops cooking instantly
- Prevents green/gray yolk ring
- Shrinks egg from shell for easier peeling
STEP 5: ICE BATH SHOCK
- When timer ends, immediately remove eggs
- Transfer directly into ice bath using tongs
- Let sit at least 10 minutes
- 15 minutes is better for peeling
Do not skip or shorten this step.
STEP 6: PEELING (BEST METHOD)
For Easiest Peeling:
- Tap egg firmly on counter to crack all over
- Roll gently to loosen shell
- Start peeling from the wide end
- There’s an air pocket here
- Peel under running water or submerged in bowl
Older eggs peel easier than very fresh eggs.
DONENESS CHART
| Time | Result |
|---|---|
| 13 min | Jammy center |
| 14 min | Mostly firm |
| 15 min | Classic hard-boiled |
| 16 min | Fully firm |
| 17 min | Extra firm |
COMMON PROBLEMS & FIXES
Egg Exploded?
- Temperature too high
- Reduce to 250°F
- Ensure no cracks before cooking
Gray/Green Ring?
- Eggs overcooked
- Ice bath skipped or too short
- Reduce cook time by 1 minute
Hard to Peel?
- Eggs too fresh
- Not enough ice bath time
- Start peeling from wide end
STORAGE
Unpeeled Eggs
- Refrigerate up to 7 days
- Store in original carton or covered container
Peeled Eggs
- Refrigerate up to 5 days
- Store submerged in water in airtight container
- Change water daily
FLAVOR IDEAS (AFTER PEELING)
- Sprinkle with salt & pepper
- Paprika + olive oil
- Everything bagel seasoning
- Soy sauce + sesame oil
- Chili crisp
- Slice into salads or grain bowls
NUTRITION (1 LARGE EGG)
Calories: : 70
Protein: 6g
Fat: 5g
Carbs: <1g
QUICK SUMMARY
- 250°F for 15–17 minutes
- Immediate ice bath for 10–15 minutes
- Peel from wide end
- Store properly