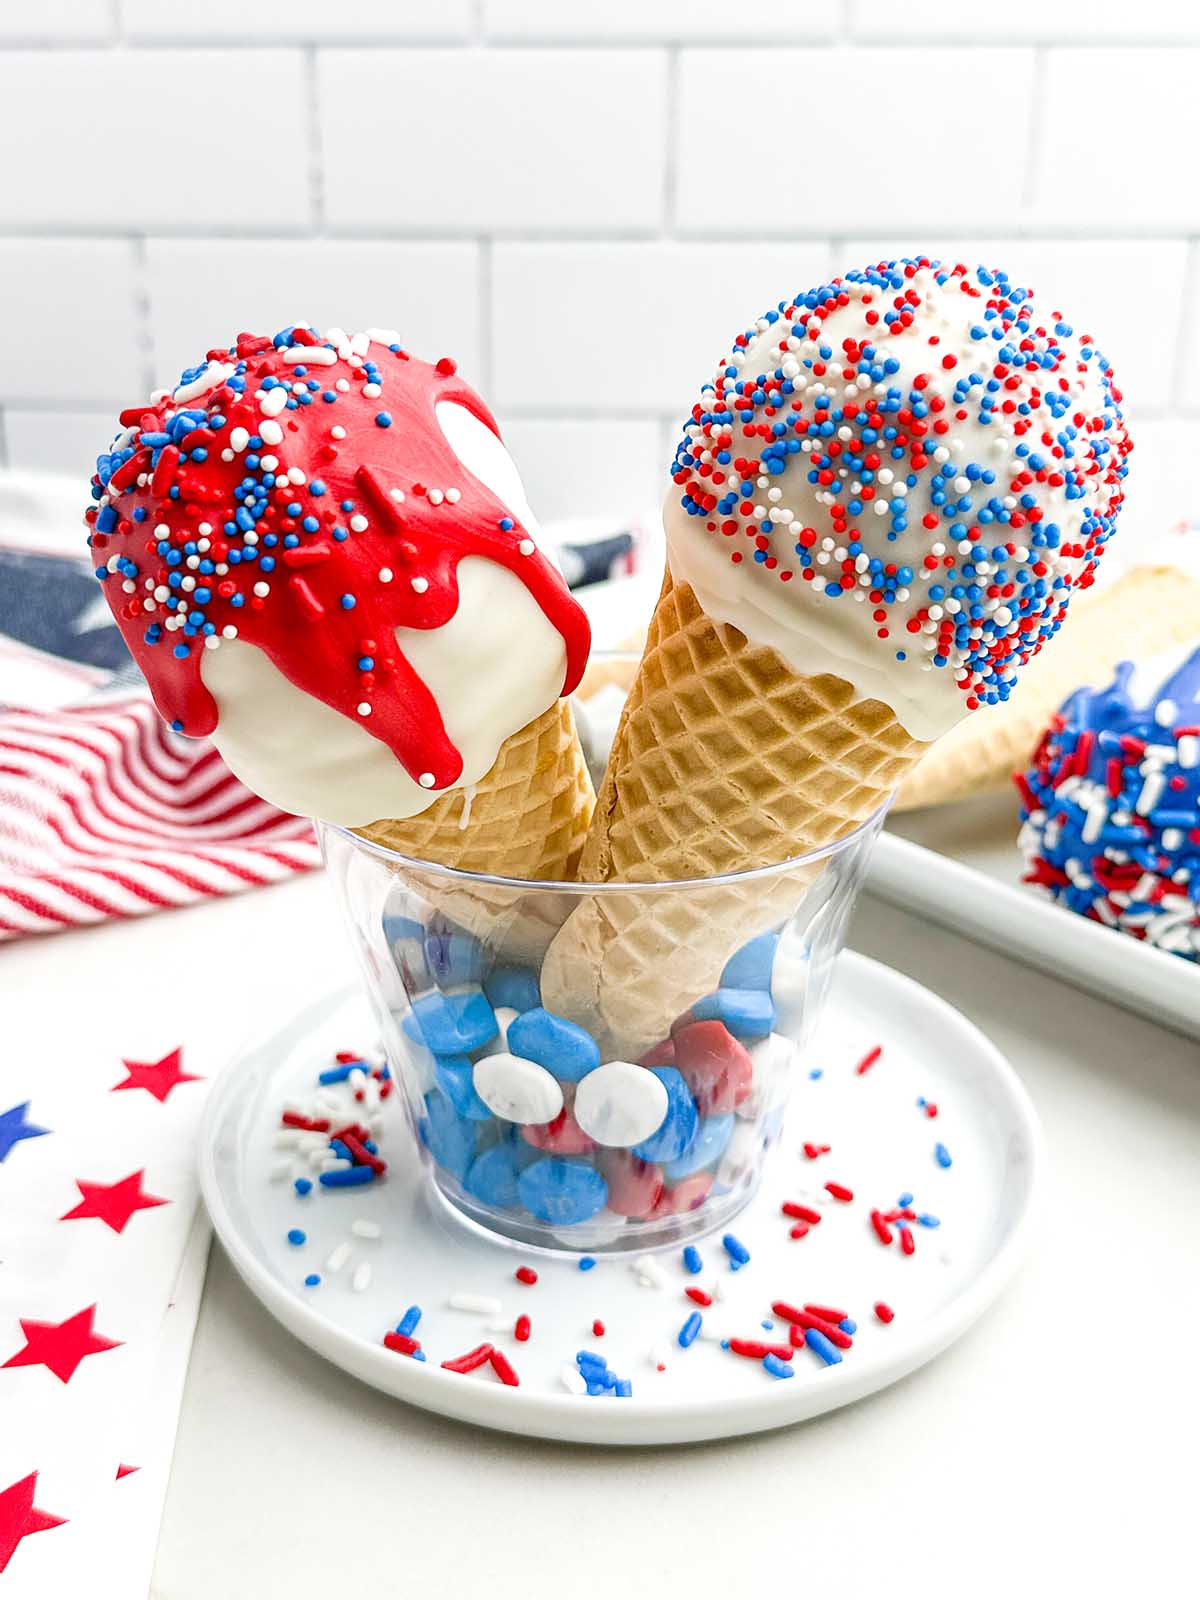
Delightful Ice Cream Cone Cake Pops:
Cake pops are a fun, creative, and delicious dessert for any occasion, from summer parties to birthday celebrations. These Ice Cream Cone Cake Pops are a playful spin on traditional cake pops, combining the charm of ice cream cones with the irresistible flavor of cake balls. With no baking required, this no-fuss recipe is perfect for both kids and adults.
Why Ice Cream Cone Cake Pops Are Perfect for Every Occasion
- Easy to Make: This is a no-bake recipe, making it accessible for anyone, even beginner bakers.
- Fun Presentation: The look of a miniature ice cream cone is sure to delight everyone at your party.
- Customizable: Swap flavors, colors, and decorations to fit your event theme.
- Convenient Prep: Prepare them in advance and store until ready to serve.
Ingredients You’ll Need
Here’s what you’ll need to bring these cake pops to life. For exact measurements, refer to the recipe card at the end of the post.
- Store-bought pound cake: Any flavor works. Opt for vanilla, chocolate, or lemon to suit your preference.
- Frosting: Vanilla frosting works wonderfully, but you can use cream cheese, buttercream, or even strawberry frosting.
- Sugar cones: These serve as the “ice cream cone” base for your cake pops.
- Candy melts or white chocolate chips: These create a smooth coating for the cake pops and add vibrant color when melted.
- Sprinkles and candies: Add a festive touch to your creations.
- Shortening or oil: Aids in thinning the chocolate for easier dipping.
Tips and Tricks for Perfect Cake Pops
1. Getting the Right Cake Ball Texture
- Use just enough frosting to hold the cake crumbs together. Too much frosting will make the mixture overly soft and difficult to shape.
- Compact the cake balls gently—press them firmly enough to stay together, but avoid over-compressing.
2. Mastering the Chocolate Coating
- Melt chocolate slowly in short intervals in the microwave, stirring often to prevent burning.
- Add a small amount of oil or shortening to achieve a smooth and glossy finish.
3. Standing Cones Upright
- Use small glasses, mason jars, or weighted cups to hold your cones upright while the chocolate coating sets.
Creative Variations for Your Ice Cream Cone Cake Pops
Flavor Combinations
- Red Velvet & Cream Cheese: Pair a moist red velvet cake with tangy cream cheese frosting for a decadent treat.
- Chocolate Lovers’ Delight: Combine chocolate cake with fudge frosting, then coat in dark chocolate.
- Strawberry Lemonade: Match strawberry cake with lemon frosting for a bright, summery flavor.
Decorating Ideas
- Drizzle contrasting colors of candy melts over the top for a swirled effect.
- Add edible glitter for a touch of sparkle.
- Use themed sprinkles for holidays like Christmas or the 4th of July.
How to Store and Make Ahead
Storing Your Cake Pops
- Once firm, store your cake pops in an airtight container at room temperature for up to 3 days or refrigerate for up to a week.
- To keep them fresh and intact, lay them on their sides rather than stacking.
Making Ahead
- Form and freeze the cake balls up to 6 weeks in advance. Thaw in the refrigerator before assembling.
- Dip and decorate them a day before your event to save time.
Top Tips for Success
- Chill the cake balls thoroughly before dipping to prevent them from falling apart.
- Allow excess chocolate to drip off after each dip to create a clean finish.
- Use a spoon to drizzle candy melts for a smooth, professional look.
Ice Cream Cone Cake Pops Recipe:
- Prep Time: 1hour
- Total Time: 1hour
- Servings: 8
- Calories: 527 kcal
Ingredients
- 16 oz store-bought pound cake
- ½ cup vanilla frosting
- 8 sugar cones
- 2 cups white chocolate chips or candy melts
- ½ cup colored candy melts (red, blue, or your choice)
- 2½ teaspoons shortening or oil (to thin chocolate)
- Sprinkles and candies for topping
Instructions
- Prepare the Cake Balls: Crumble the pound cake into fine crumbs using your hands or a mixer. Mix in the frosting until it forms a dough that holds together. Scoop and roll into 8 compact balls. Freeze on a lined baking sheet for 30 minutes.
- Attach to Cones: Melt 1 cup of white chocolate with 1 teaspoon of oil in the microwave. Dip the rim of each cone into the melted chocolate. Dip the bottom of each cake ball into the chocolate and press it onto the cone. Stand upright in a glass or jar. Chill until set.
- Coat the Cake Pops: Melt the remaining white chocolate with 1 teaspoon of oil. Dip the entire cake ball into the chocolate, ensuring an even coat. Let the excess chocolate drip off and place upright in glasses to harden.
- Add Toppings: Melt colored candy melts with ½ teaspoon of oil. Drizzle the melted candy over the coated cake pops and sprinkle with your favorite decorations. Chill until the candy hardens completely.
- Serve and Store: Enjoy your cake pops fresh or store them in an airtight container as described above.
Notes
- Use shortening or oil to thin the chocolate and candy melts as needed. I typically use a ratio of 1 teaspoon oil per cup.
- The cake balls should be very cold before dipping.
- To stand the cones upright while the candy coating dries, use small glasses, mason jars, or weighted-down plastic cups.
Nutrition
Calories: 527kcalCarbohydrates: 78gProtein: 6gFat: 22gSaturated Fat: 12gPolyunsaturated Fat: 2gMonounsaturated Fat: 6gTrans Fat: 0.2gCholesterol: 67mgSodium: 436mgPotassium: 194mgFiber: 0.5gSugar: 60gVitamin A: 101IUVitamin C: 0.2mgCalcium: 131mgIron: 2mg
Enjoy these whimsical Ice Cream Cone Cake Pops, the perfect blend of creativity and flavor!