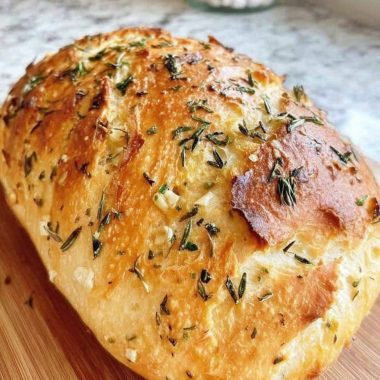
These gluten-free cinnamon rolls are soft, tender, and perfectly spiced, with a rich cinnamon-sugar filling and a smooth glaze. Because gluten-free dough behaves differently from traditional dough, this recipe includes precise techniques to help you achieve the best texture.
Ingredients
For the Dough
- 3 ½ cups gluten-free all-purpose flour (with xanthan gum included)
- 2 ¼ teaspoons active dry yeast (1 packet)
- ¼ cup granulated sugar
- 1 teaspoon salt
- 1 cup warm milk (about 110°F / 43°C)
- ¼ cup unsalted butter, melted
- 2 large eggs, room temperature
- 1 teaspoon apple cider vinegar
For the Filling
- ½ cup unsalted butter, softened
- ¾ cup brown sugar (packed)
- 2 tablespoons ground cinnamon
- 1 teaspoon vanilla extract
For the Glaze
- 1 cup powdered sugar
- 2–3 tablespoons milk
- ½ teaspoon vanilla extract
Equipment
- Mixing bowls
- Stand mixer (recommended) or hand mixer
- Rolling pin
- Parchment paper
- 9×13 inch baking dish
Step-by-Step Instructions
Step 1: Activate the Yeast
- In a small bowl, combine warm milk and sugar.
- Sprinkle the yeast over the top.
- Let it sit for 5–10 minutes until foamy.
If the mixture does not foam, the yeast may be inactive. Start again with fresh yeast.
Step 2: Prepare the Dough
- In a large mixing bowl, combine gluten-free flour and salt.
- Add the yeast mixture, melted butter, eggs, and apple cider vinegar.
- Mix on medium speed for 3–5 minutes until a thick, sticky dough forms.
Important note: Gluten-free dough is softer and stickier than regular dough. This is expected.
Step 3: First Rise
- Cover the bowl with plastic wrap or a clean towel.
- Let the dough rise in a warm place for 45–60 minutes.
The dough should increase in size, though not necessarily double.
Step 4: Prepare the Filling
- In a bowl, mix softened butter, brown sugar, cinnamon, and vanilla.
- Stir until it forms a smooth, spreadable paste.
Step 5: Roll the Dough
- Place the dough on parchment paper lightly dusted with gluten-free flour.
- Dust the top lightly as well.
- Roll into a rectangle about ¼ inch thick.
Work gently and patiently, as gluten-free dough can be delicate.
Step 6: Add the Filling
- Spread the cinnamon filling evenly across the dough.
- Leave a small border around the edges.
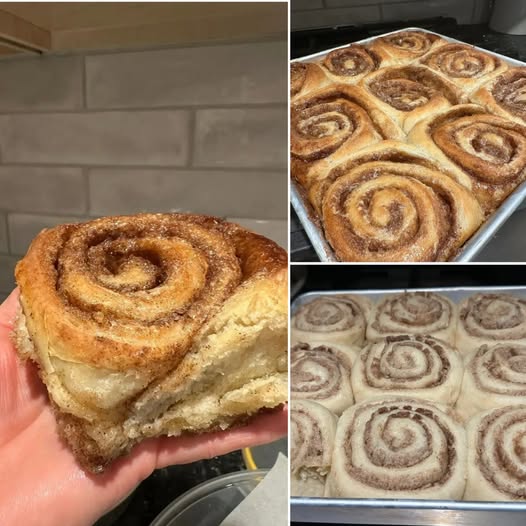
Step 7: Shape the Rolls
- Using the parchment paper to assist, roll the dough tightly into a log.
- Slice into 9–12 equal pieces using a sharp knife or dental floss.
Step 8: Second Rise
- Place the rolls into a greased baking dish.
- Cover and let rise for 30–45 minutes.
They should become slightly puffy.
Step 9: Bake
- Preheat oven to 350°F (175°C).
- Bake for 20–25 minutes until golden and set.
Avoid overbaking, as gluten-free baked goods can dry out quickly.
Step 10: Make the Glaze
- In a bowl, whisk powdered sugar, milk, and vanilla.
- Adjust consistency as needed.
Step 11: Finish
- Let rolls cool slightly.
- Drizzle glaze over warm rolls.
Serve immediately for best texture and flavor.
Tips for Success
Use the Right Flour
A high-quality gluten-free flour blend with xanthan gum is essential. Without it, the rolls may crumble.
Moisture Matters
Gluten-free dough needs more moisture than regular dough. Do not add too much extra flour during rolling.
Handle Gently
The dough is more fragile, so avoid overworking it.
Warm Environment for Rising
If your kitchen is cool, place the dough in an oven with just the light on to help it rise.
Storage Instructions
- Room temperature: Store in an airtight container for up to 2 days.
- Refrigerator: Up to 5 days (reheat before serving).
- Freezer: Freeze unfrosted rolls for up to 2 months.
Optional Variations
Cream Cheese Frosting
Replace the glaze with a mixture of:
- 4 oz cream cheese
- 2 tablespoons butter
- 1 cup powdered sugar
- ½ teaspoon vanilla
Raisin Cinnamon Rolls
Add ½ cup raisins to the filling.
Dairy-Free Version
Use plant-based milk and vegan butter.