This is a detailed, slow, and carefully structured diabetic cake recipe written so you can follow it like a guide from start to finish. Every step includes not just instructions but also explanations, so you understand how diabetic baking works and how to avoid common problems like dryness, density, or poor rise.
The goal is a cake that is:
- Low in refined sugar impact
- Soft and moist in texture
- Properly risen and fluffy
- Still enjoyable as a real dessert
STEP 1: Understand What You Are Making
Before you even touch ingredients, it helps to understand the structure of this cake.
A normal cake relies heavily on sugar for:
- Sweetness
- Moisture retention
- Browning
- Soft texture
In a diabetic cake, sugar is replaced with:
- Sugar substitutes (erythritol, stevia blends, monk fruit)
- Yogurt for moisture
- Healthy fats for softness
- Fiber-rich flours for structure
This means technique becomes more important than ingredients alone.
STEP 2: Preheat Oven and Prepare Pan
- Set oven to 180°C (350°F).
- Allow it to fully preheat (at least 10–15 minutes).
- Choose a cake pan (round or loaf).
- Grease it lightly with oil or butter.
- Line the base with baking paper.
Why this matters:
A cold oven prevents proper rise. A sticky pan can ruin cake shape.
STEP 3: Gather and Measure Ingredients
Prepare everything before mixing.
Dry ingredients:
- 1 cup whole wheat flour
- ½ cup oat flour
- ½ cup almond flour
- 1 tsp baking powder
- ½ tsp baking soda
- ¼ tsp salt
- 1 tsp cinnamon (optional but recommended)
Wet ingredients:
- 2 eggs (room temperature)
- ½ cup unsweetened yogurt
- ⅓ cup coconut oil or olive oil
- ½ cup unsweetened milk
- 1 tsp vanilla extract
- ½ cup diabetic sweetener (erythritol or stevia blend)
Optional:
- Nuts
- Cocoa powder
- Grated apple or carrot
STEP 4: Mix Dry Ingredients Carefully
- Take a large bowl.
- Add all flours (wheat, oat, almond).
- Add baking powder and baking soda.
- Add salt and cinnamon.
- Whisk for 1–2 minutes thoroughly.
Why this step is important:
Even distribution ensures even rising and prevents bitter spots from baking soda.
Texture check:
Dry mixture should look uniform and light.
STEP 5: Prepare Wet Mixture
- Take another bowl.
- Crack eggs and whisk until smooth.
- Add yogurt and mix well.
- Add oil slowly while mixing.
- Add milk and vanilla extract.
- Add diabetic sweetener.
Mix until smooth and slightly creamy.
Important note:
Sugar substitutes may not dissolve fully but will integrate during baking.
STEP 6: Combine Wet and Dry Mixtures
- Add dry mixture into wet mixture gradually.
- Do it in 2–3 parts.
- Mix gently using a spatula.
- Stop when no dry flour is visible.
Do NOT overmix.
Why:
Overmixing develops gluten and makes cake hard instead of soft.
Correct batter should be:
- Thick but flowing
- Smooth
- Lump-free
STEP 7: Adjust Batter Consistency
Check texture:
If batter is too thick:
- Add 1–2 tbsp milk
If too thin:
- Add 1 tbsp flour
Mix gently again.
Goal:
Batter should fall slowly from spoon, not pour like water.
STEP 8: Add Optional Ingredients
Now customize your cake:
- Add chopped nuts for crunch
- Add cocoa powder for chocolate version
- Add grated apple/carrot for moisture
- Add raisins in small quantity
Fold gently.
Avoid overmixing at this stage.
STEP 9: Pour Batter into Pan
- Pour batter into prepared pan.
- Spread evenly with spatula.
- Tap pan 2–3 times on counter.
Why tapping matters:
It removes air bubbles and prevents holes inside cake.
STEP 10: Bake the Cake
- Place pan in preheated oven.
- Bake at 180°C for 35–50 minutes.
- Do not open oven for first 25–30 minutes.
During baking:
- Cake rises slowly
- Aroma develops
- Top turns golden
STEP 11: Check Doneness
After 35–40 minutes:
- Insert toothpick in center
- Pull it out
Results:
- Clean → done
- Wet batter → bake more
Other signs:
- Cake springs back when touched
- Edges pull slightly from pan
STEP 12: Remove from Oven
- Take cake out carefully.
- Place it on a stable surface.
- Let it rest in pan for 10–15 minutes.
Why:
Hot cake is fragile and needs time to set.
STEP 13: Remove from Pan
- Run a knife along edges if needed.
- Carefully lift or invert cake.
- Place on cooling rack.
Cooling rack allows air circulation and prevents sogginess.
STEP 14: Cool Completely
Let cake cool for at least 45–60 minutes.
Why cooling is essential:
- Texture stabilizes
- Moisture distributes evenly
- Cutting becomes clean
Never cut hot cake.
STEP 15: Serve
Once fully cooled:
- Slice evenly
- Serve plain or with nuts on top
- Optional: sugar-free glaze or yogurt topping
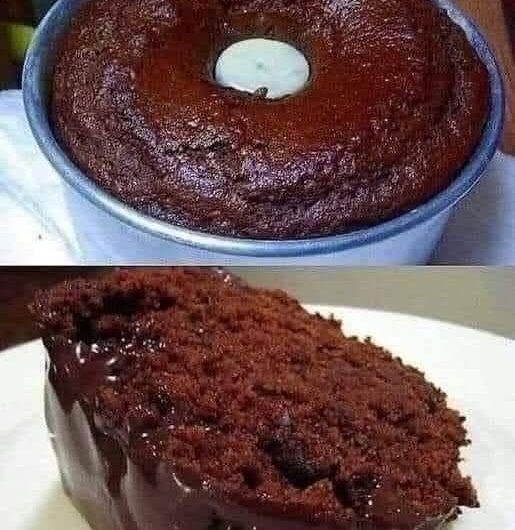
FINAL TEXTURE RESULT
A well-made diabetic cake should be:
- Soft and moist
- Lightly sweet
- Slightly nutty
- Not dense or heavy
- Balanced in flavor
STORAGE
- Room temperature: 1–2 days (covered)
- Refrigerator: up to 6 days
- Freezer: up to 1 month
Reheat:
- Microwave for 10–15 seconds
- Or warm in oven for better texture
COMMON MISTAKES (AND FIXES)
Cake is dry
Cause: too much flour or overbaking
Fix: reduce baking time or add more yogurt next time
Cake is dense
Cause: overmixing
Fix: mix gently only until combined
Cake not sweet enough
Cause: weak sweetener or low quantity
Fix: adjust sweetener type or blend
Cake did not rise
Cause: old baking powder or cold oven
Fix: always preheat oven and check freshness
FINAL RESULT
When done correctly, this diabetic cake becomes:
- Moist and soft
- Light in sweetness
- Suitable for controlled diets
- A healthier alternative to traditional cakes