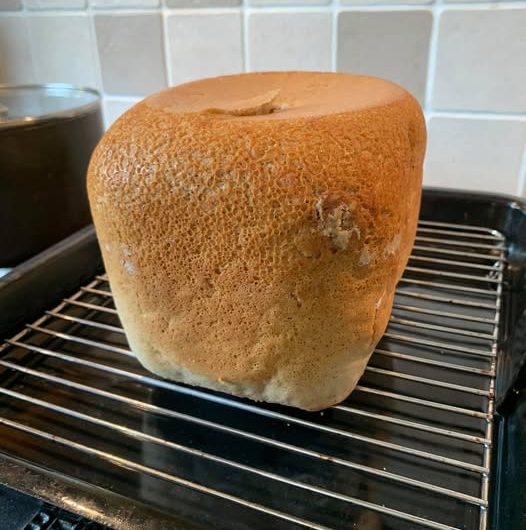
This gluten-free brown loaf is designed to have a rich flavor, soft texture, deep brown color, and excellent sliceability without the dryness that often affects gluten-free bread. The loaf uses a balanced blend of gluten-free flours, natural moisture-retaining ingredients, and a careful fermentation process to create a bakery-style result at home.
The recipe is intentionally detailed so every step is easy to follow, even for beginners. The final bread works beautifully for sandwiches, toast, breakfast spreads, soups, and everyday table bread.
The loaf has:
- A soft but sturdy crumb
- Mild earthy flavor
- Moist interior
- Flexible slices that do not crumble easily
- A slightly chewy crust
- Good shelf life for gluten-free bread
This recipe makes 1 large loaf.
Preparation Time
Preparation time: 35 minutes
First rise: 45 to 60 minutes
Second rise: 25 to 35 minutes
Baking time: 50 to 60 minutes
Cooling time: 2 hours
Total time: Approximately 4 hours
Equipment Needed
- Large mixing bowl
- Medium bowl
- Whisk
- Wooden spoon or dough whisk
- Stand mixer with paddle attachment if available
- 9 x 5 inch loaf pan
- Kitchen scale recommended
- Clean kitchen towel or plastic wrap
- Cooling rack
Ingredients
Dry Ingredients
150 grams brown rice flour
120 grams sorghum flour
80 grams oat flour certified gluten-free
60 grams tapioca starch
40 grams potato starch
25 grams ground flaxseed
15 grams psyllium husk powder
10 grams cocoa powder unsweetened for deeper brown color
2 teaspoons xanthan gum
2 teaspoons instant yeast
1 ½ teaspoons salt
2 tablespoons dark brown sugar
Wet Ingredients
420 milliliters warm water approximately 38°C to 40°C
3 tablespoons olive oil
2 tablespoons molasses
1 tablespoon apple cider vinegar
2 large eggs room temperature
2 tablespoons plain yogurt or dairy-free yogurt
Optional Flavor Enhancers
1 tablespoon sunflower seeds
1 tablespoon pumpkin seeds
1 teaspoon caraway seeds
1 teaspoon instant coffee powder for stronger brown bread flavor
Why These Ingredients Matter
Brown rice flour provides structure and mild nutty flavor.
Sorghum flour gives softness and a wheat-like taste.
Oat flour improves tenderness and moisture.
Tapioca starch helps elasticity and chewiness.
Potato starch creates softness and improves rise.
Psyllium husk is extremely important because it creates flexibility and replaces much of the structure normally provided by gluten.
Molasses deepens the flavor and creates the characteristic brown loaf color.
Apple cider vinegar improves yeast activity and crumb texture.
Eggs provide stability and richness.
Yogurt adds softness and moisture retention.
Step 1: Prepare the Psyllium Gel
In a medium bowl, combine the warm water and psyllium husk powder.
Whisk immediately for about 20 seconds. The mixture will begin thickening quickly into a gel-like texture.
Allow it to sit for 3 to 5 minutes.
This step is essential because psyllium forms the structure that helps hold the loaf together.
Step 2: Mix the Dry Ingredients
In a large mixing bowl combine:
- Brown rice flour
- Sorghum flour
- Oat flour
- Tapioca starch
- Potato starch
- Ground flaxseed
- Cocoa powder
- Xanthan gum
- Instant yeast
- Salt
- Brown sugar
Whisk thoroughly for at least 1 minute.
Proper mixing prevents uneven texture and improves the final crumb.
Step 3: Mix the Wet Ingredients
Into the psyllium gel add:
- Olive oil
- Molasses
- Apple cider vinegar
- Eggs
- Yogurt
Whisk until smooth and fully combined.
The mixture should appear glossy and thick.
Step 4: Form the Dough
Pour the wet mixture into the bowl of dry ingredients.
Mix using a wooden spoon or stand mixer with paddle attachment.
Mix for 5 to 7 minutes.
Unlike traditional wheat dough, gluten-free bread dough is usually more like a thick batter than kneadable dough.
The dough should be:
- Thick
- Sticky
- Smooth
- Scoopable
- Slightly elastic
If the dough feels extremely dry, add 1 tablespoon water at a time.
If the dough looks too loose or watery, add 1 tablespoon oat flour at a time.
Step 5: Add Optional Seeds
Fold in sunflower seeds, pumpkin seeds, or caraway seeds if desired.
These ingredients add texture and improve the rustic flavor of the loaf.
Step 6: Prepare the Loaf Pan
Grease a 9 x 5 inch loaf pan thoroughly.
You may also line it with parchment paper for easier removal.
Transfer the dough into the pan.
Use a wet spatula or damp hands to smooth the top evenly.
Gluten-free dough benefits from shaping before proofing because it will not reshape easily later.
Step 7: First Rise
Cover the loaf loosely with plastic wrap or a damp towel.
Place in a warm draft-free area.
Allow it to rise for 45 to 60 minutes.
The dough should rise noticeably and increase by approximately 50 percent.
Do not overproof because gluten-free dough can collapse more easily than wheat dough.
Step 8: Optional Topping
Before baking you may brush the top lightly with olive oil or milk.
Optional toppings include:
- Oats
- Seeds
- Sesame
- Flax
- Cracked pepper
Step 9: Bake the Bread
Preheat oven to 190°C.
Place the loaf on the center rack.
Bake for 50 to 60 minutes.
After approximately 30 minutes you may loosely cover the loaf with foil if the crust darkens too quickly.
The bread is fully baked when:
- The crust feels firm
- The loaf sounds hollow when tapped
- Internal temperature reaches approximately 96°C
Step 10: Cooling
Remove the loaf from the pan immediately after baking.
Place on a cooling rack.
Allow the bread to cool completely for at least 2 hours before slicing.
This cooling period is extremely important because gluten-free bread continues setting internally after baking.
Cutting too early may create a gummy texture.
Texture and Flavor Notes
This loaf has a balanced earthy flavor with mild sweetness from molasses.
The crumb remains soft while still holding together well for sandwiches.
The crust is slightly chewy with gentle crispness after cooling.
The bread toasts beautifully and develops a deeper flavor the next day.
Storage Instructions
Room Temperature
Store in an airtight container for up to 2 days.
Refrigerator
Store for up to 5 days.
Warm slices slightly before serving for best texture.
Freezer
Slice the loaf completely before freezing.
Separate slices with parchment paper.
Freeze for up to 2 months.
Toast directly from frozen when needed.
Common Problems and Solutions
Bread Too Dense
Possible causes:
- Dough too dry
- Not enough rise time
- Expired yeast
- Too much heavy flour
Solution:
Add slightly more water and ensure yeast is active.
Bread Collapsed After Baking
Possible causes:
- Overproofing
- Too much moisture
- Oven temperature too low
Solution:
Reduce proofing time slightly and verify oven temperature accuracy.
Gummy Interior
Possible causes:
- Underbaking
- Cutting while warm
- Too much starch
Solution:
Bake longer and cool completely.
Dry Bread
Possible causes:
- Too much flour
- Insufficient oil
- Overbaking
Solution:
Increase hydration slightly and monitor baking time carefully.
Variations
Seeded Brown Loaf
Add:
- 2 tablespoons sunflower seeds
- 2 tablespoons flaxseed
- 1 tablespoon sesame seeds
Dairy-Free Version
Replace yogurt with coconut yogurt or almond yogurt.
Egg-Free Version
Replace eggs with:
2 flax eggs made from:
- 2 tablespoons flaxseed meal
- 6 tablespoons water
Slightly Sweeter Brown Bread
Increase molasses to 3 tablespoons and add 1 tablespoon honey.
Serving Ideas
This bread pairs well with:
- Avocado
- Peanut butter
- Soup
- Grilled vegetables
- Eggs
- Cheese
- Chicken sandwiches
- Toasted butter and jam
It also works wonderfully for grilled sandwiches because the structure holds up well after heating.