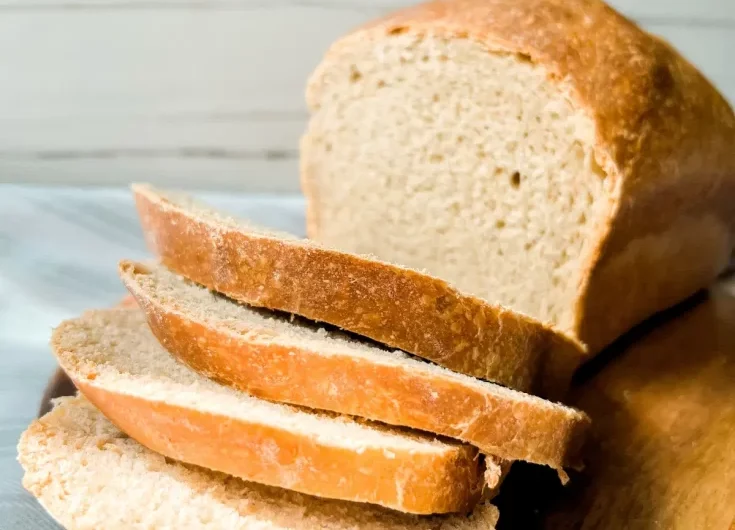
Gluten-Free Bread Baking
If you’ve ever been on a quest to bake gluten-free bread, you’ve likely realized it’s an art that requires precision and patience. This guide will walk you through every step of the process, sharing essential tips and techniques to ensure your bread turns out soft, moist, and full of flavor. By the end, you’ll not only know how to bake a perfect gluten-free loaf but also understand the science behind the process.
The Foundation: Mixing the Dough
Step 1: Combine Dry Ingredients
The magic of gluten-free bread begins with the right blend of dry ingredients. Start by whisking together the all-purpose gluten-free flour (if your blend doesn’t already include it), instant yeast, cream of tartar, granulated sugar, and salt. This step ensures an even distribution of the leavening agents and other components, crucial for achieving a consistent rise and flavor
Step 2: Add the Wet Ingredients
Incorporate the wet ingredients into your dry mixture: warm milk, melted butter, apple cider vinegar, and egg whites. The warm milk activates the yeast, while the vinegar helps to tenderize the crumb. Use a stand mixer fitted with a paddle attachment to combine the ingredients until the dough reaches a thick, batter-like consistency. This unique texture sets gluten-free bread apart from traditional kneadable doughs.
Creating Structure: Beating and Rising
Step 3: Beat the Dough to Perfection
Turn your mixer to medium-high speed and beat the dough for approximately three minutes. This step aerates the batter, creating a light and fluffy structure that will support the rise. The dough’s texture should resemble a thick, sticky batter—not something you’d knead by hand
Transfer the dough to a prepared loaf pan, smoothing the top with a wet spatula. Cover it with plastic wrap and let it rise in a warm, draft-free area. The dough should increase in size by about 50%, though it won’t double as traditional bread does. Patience is key; a slow, steady rise ensures the bread’s texture remains light and even.
Baking to Perfection
Step 5: Bake the Loaf
Preheat your oven to 375°F (190°C) and bake the bread for about 50 minutes. To determine doneness, use an instant-read thermometer; the internal temperature should reach around 200°F (93°C). The crust will turn golden brown, while the interior remains soft and moist
Step 6: Cool Completely Before Slicing
Allow the bread to cool in the pan for 10 minutes before transferring it to a wire rack. Let it cool completely to avoid squishing the loaf when slicing. Use a serrated knife for clean, even cuts.
Pro Tips for Gluten-Free Bread Success
1. Use a High-Quality Flour Blend
Choosing the right flour blend is critical. A mix like Better Batter or a homemade equivalent provides the perfect balance of starches and proteins to mimic the elasticity of gluten.
2. Don’t Skip the Xanthan Gum
Xanthan gum acts as a binding agent, essential for holding the bread’s structure. If your flour blend lacks it, be sure to add the specified amount
3. Measure Ingredients by Weight
For consistent results, use a digital kitchen scale. Weight measurements eliminate the guesswork of volume-based measurements, ensuring your ratios are accurate.
4. Create the Ideal Rising Environment
Yeast thrives in a warm, humid environment. Avoid placing your dough in an oven that’s too hot; this can kill the yeast. Instead, choose a naturally warm spot in your kitchen.
5. Invest in the Right Pan
A Pullman loaf pan works wonders for gluten-free bread. Its tall, narrow shape promotes even baking and creates slices perfect for sandwiches.
6. Mind the Moisture
Gluten-free dough is highly absorbent. Keep it covered during the rise to prevent it from drying out. If you live in a particularly dry climate, consider using a damp cloth instead of plastic wrap.
7. Avoid Overproofing
Overproofing can cause your bread to collapse after baking. Watch for visual cues, like a pock-marked surface, to determine when the dough has risen enough.
Common Pitfalls and How to Avoid Them
Why Didn’t My Bread Rise?
- You used the wrong type or amount of yeast.
- The dough was too dry, or the yeast was exposed to excessive heat.
Why Is My Bread Gummy?
- The bread wasn’t baked long enough.
- Too much liquid was added to the dough.
Why Did My Bread Sink?
- Overproofing or too much yeast caused the structure to collapse.
- The oven temperature was too high, baking the crust before the interior set.
How to Adjust for High Altitude
- Decrease the yeast and sugar slightly to prevent over-rising.
- Increase the baking temperature slightly to help set the bread’s structure faster.
-
- Fluffy and Soft Gluten-Free Bread Recipe
Ingredients
-
3 cups (420 g) all-purpose gluten-free flour blend (like Better Batter or a mock blend)
-
3 tsp gum (if not already in the flour blend)
-
2 1/2 tsp (8 g) instant yeast
-
1/4 tsp cream of tartar
-
2 tbsp (25 g) granulated sugar
-
2 tsp (12 g) kosher salt
-
1 1/2 cups (12 oz) warm milk (around 95°F)
-
4 tbsp (56 g) unsalted butter, melted and cooled
-
1 tsp apple cider vinegar
-
2 egg whites (50 g), room temperature
-
Optional: toasted sesame seeds for topping
Directions
- Grease or line a 9×5-inch loaf pan and set aside.
- In a stand mixer bowl, combine the flour, xanthan gum, yeast, cream of tartar, sugar, and salt. Whisk thoroughly.
- Add the milk, butter, vinegar, and egg whites. Mix on low speed, gradually increasing to medium-high, for about 3 minutes.
- Scrape the dough into the prepared loaf pan and smooth the top with a wet spatula.
- Cover and let rise in a warm, draft-free spot until 50% larger, about 1 hour.
- Preheat the oven to 375°F (190°C). Bake the loaf for about 50 minutes or until the internal temperature reaches 200°F (93°C).
- Let cool for 10 minutes in the pan, then transfer to a wire rack to cool completely.
-
- Fluffy and Soft Gluten-Free Bread Recipe