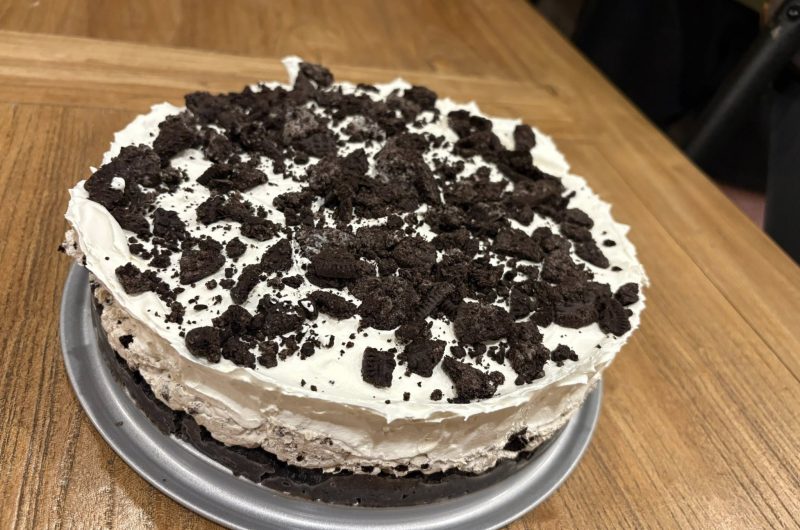
Gluten-Free Oreo Pie (Ultra-Creamy, No-Bake)
This pie is rich, chocolatey, silky, and dangerously easy to eat. It works for holidays, birthdays, or “I deserve dessert” days.
TABLE OF CONTENTS
-
What This Pie Is Like
-
Equipment You’ll Need
-
Ingredients (with Substitutions)
-
Step-by-Step Instructions
-
Chilling & Serving
-
Make-Ahead & Storage
-
Troubleshooting
-
Variations & Add-Ons
-
Pro Tips for Best Results
WHAT THIS PIE IS LIKE
-
Texture: Creamy, mousse-like filling + crunchy Oreo crust
-
Flavor: Deep chocolate, vanilla cream, lightly sweet (not cloying)
-
Skill level: Easy (no baking, no fancy techniques)
-
Time:
-
Prep: ~30 minutes
-
Chill: 4–6 hours (or overnight for best results)
-
EQUIPMENT YOU’LL NEED
✔ 9-inch pie pan (glass or metal)
✔ Food processor or rolling pin + zip-top bag
✔ Mixing bowls (medium + large)
✔ Hand mixer or stand mixer
✔ Rubber spatula
✔ Measuring cups & spoons
INGREDIENTS
Gluten-Free Oreo Crust
-
28 gluten-free Oreo-style cookies
(Cream filling included — do NOT scrape it out) -
6 tablespoons unsalted butter, melted
-
Pinch of salt (optional but recommended)
Oreo Cream Filling
-
8 oz cream cheese, softened (very important)
-
¾ cup powdered sugar, sifted
-
1 teaspoon vanilla extract
-
1½ cups heavy whipping cream, cold
-
12 gluten-free Oreo cookies, chopped or crushed
Optional Chocolate Topping (Highly Encouraged)
-
½ cup heavy cream
-
4 oz semi-sweet chocolate, chopped
(or ⅔ cup chocolate chips — gluten-free)
INSTRUCTIONS
Make the Crust
-
Place 28 GF Oreo cookies into a food processor.
Pulse until they look like fine, dark sand.No processor?
-
Put cookies in a zip-top bag
-
Crush with a rolling pin until finely ground
-
-
Pour crumbs into a bowl.
Add melted butter and pinch of salt. -
Mix until crumbs look evenly moist and hold together when pressed.
-
Press mixture firmly into a 9-inch pie pan:
-
Bottom first
-
Then up the sides
-
Use a measuring cup to pack it tight
-
-
Place crust in the fridge while you make the filling.
⏱ Chill time so far: ~10 minutes
Prepare the Cream Base
-
In a large bowl, beat softened cream cheese until completely smooth.
No lumps. None. Zero. -
Add powdered sugar and vanilla.
Beat again until fluffy and silky.
If it looks grainy, keep mixing — it will smooth out.
Whip the Cream
-
In a separate cold bowl, pour in cold heavy cream.
-
Beat on medium-high until stiff peaks form:
-
When you lift the beaters, the cream should stand up firmly
-
Do NOT overwhip or it will turn grainy
-
Combine Everything
-
Gently fold half of the whipped cream into the cream cheese mixture.
Use a spatula and slow motions. -
Fold in the remaining whipped cream until no streaks remain.
-
Add 12 chopped GF Oreos.
Fold gently so they stay chunky
-
Spoon filling into the chilled crust.
-
Smooth the top with a spatula.
-
Refrigerate for at least 4 hours
(Overnight = best texture)
OPTIONAL CHOCOLATE GANACHE TOPPING
-
Heat ½ cup cream until just steaming (not boiling).
-
Pour over chopped chocolate.
-
Let sit 2 minutes, then stir until smooth.
-
Cool slightly, then pour over chilled pie.
-
Return pie to fridge for 30 minutes to set.
CHILLING & SERVING
-
Chill minimum: 4 hours
-
Ideal chill: 8–12 hours
-
Slice with a warm knife for clean cuts
Serve plain or with:
-
Whipped cream
-
Extra crushed GF Oreos
-
Chocolate curls
MAKE-AHEAD & STORAGE
✔ Make up to 2 days ahead
✔ Store covered in fridge
✔ Keeps 4–5 days total
Not freezer-friendly (cream texture suffers)
TROUBLESHOOTING
Pie too soft?
→ Not chilled long enough or whipped cream was under-whipped
Lumpy filling?
→ Cream cheese wasn’t fully softened
Crust falling apart?
→ Needs more butter or firmer packing
VARIATIONS & FUN TWISTS
-
Peanut Butter Oreo Pie:
Add ½ cup creamy peanut butter to filling -
Mint Oreo Pie:
Add ¼ tsp peppermint extract + green-mint Oreos -
Chocolate Lover’s Version:
Add ½ cup melted chocolate to the filling -
Mini Pies:
Use muffin tin + liners for individual servings