Homemade Millionaire’s Shortbread
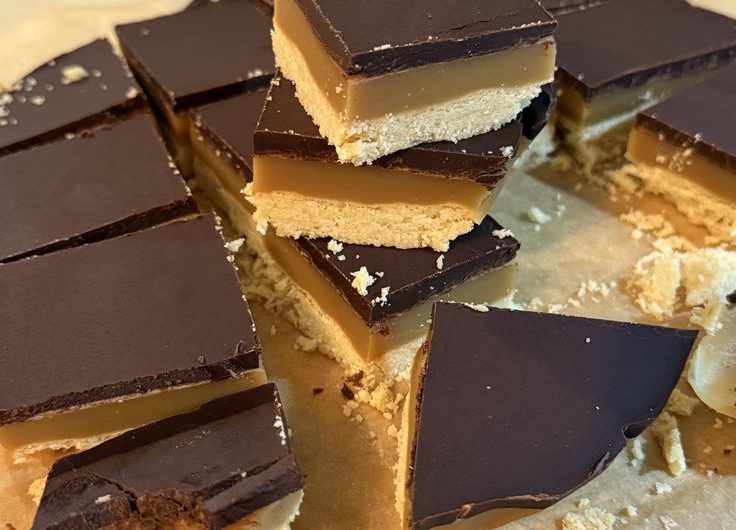
Millionaire’s Shortbread is one of the most beloved traybake desserts in the world. Originating in Scotland, this luxurious treat consists of three irresistible layers: a rich buttery shortbread base, a thick and silky caramel center, and a smooth chocolate topping. The combination of crisp shortbread, chewy caramel, and rich chocolate creates a dessert that is indulgent, elegant, and deeply satisfying.
Despite its bakery-quality appearance, Millionaire’s Shortbread can be made successfully at home with simple ingredients and careful preparation. The key to a perfect result lies in creating distinct layers while ensuring they complement one another beautifully. The shortbread should be tender yet sturdy, the caramel should be smooth and slightly chewy, and the chocolate should provide a rich finish without overpowering the other layers.
This recipe produces approximately 20 to 24 generous squares.
Preparation Time
Preparation Time: 35 minutes
Baking Time: 25 to 30 minutes
Cooling Time: 4 to 6 hours
Total Time: Approximately 6 to 7 hours
Servings: 20 to 24 squares
Difficulty Level: Intermediate
Ingredients
For the Shortbread Layer
300 grams all-purpose flour
100 grams granulated sugar
200 grams unsalted butter, softened
¼ teaspoon fine salt
1 teaspoon vanilla extract
For the Caramel Layer
200 grams unsalted butter
200 grams light brown sugar
4 tablespoons golden syrup
1 can sweetened condensed milk (397 grams)
½ teaspoon sea salt
1 teaspoon vanilla extract
For the Chocolate Layer
300 grams milk chocolate
150 grams dark chocolate
2 tablespoons unsalted butter
Optional Decorations
Chocolate curls
Sea salt flakes
Gold sprinkles
Caramel drizzle
Chocolate shavings
Equipment Needed
9 x 13-inch baking pan
Parchment paper
Mixing bowls
Heavy-bottom saucepan
Wooden spoon
Whisk
Offset spatula
Sharp knife
Cooling rack
Measuring scale
Understanding the Three Layers
A successful Millionaire’s Shortbread depends on the balance between its three components.
The shortbread base provides structure and a buttery foundation.
The caramel contributes sweetness and a luxurious chewiness.
The chocolate layer delivers richness and creates a beautiful finish.
When made properly, each layer remains distinct while blending harmoniously with the others.
Step 1: Preparing the Baking Pan
Line a 9 x 13-inch baking pan with parchment paper.
Allow excess parchment to hang over the sides.
This makes removal easier after chilling.
Lightly grease the parchment paper.
Set the pan aside.
Step 2: Preparing the Shortbread Dough
Place the softened butter into a large mixing bowl.
Add the sugar.
Cream together until light and fluffy.
This process takes approximately 3 to 4 minutes.
Add the vanilla extract.
Mix thoroughly.
In a separate bowl combine:
Flour
Salt
Gradually add the dry ingredients to the butter mixture.
Mix until a soft dough forms.
Avoid overmixing.
The dough should be soft but not sticky.
Step 3: Forming the Shortbread Base
Transfer the dough into the prepared baking pan.
Press evenly into all corners.
Use the back of a spoon or an offset spatula.
Aim for a smooth, level surface.
Prick the dough lightly with a fork.
This prevents excessive puffing during baking.
Step 4: Baking the Shortbread
Preheat the oven to 350°F (175°C).
Bake the shortbread for approximately 25 to 30 minutes.
The surface should become lightly golden.
The edges should show slight browning.
Avoid overbaking.
The shortbread will continue to firm as it cools.
Remove from the oven.
Allow to cool completely.
This step is essential before adding the caramel layer.
Step 5: Beginning the Caramel
Place a heavy-bottom saucepan over medium heat.
Add:
Butter
Brown sugar
Golden syrup
Allow the butter to melt completely.
Stir constantly.
The sugar should dissolve fully.
The mixture should become smooth and glossy.
Step 6: Adding the Condensed Milk
Pour in the sweetened condensed milk.
Stir continuously.
The mixture will initially appear thin.
Continue stirring constantly.
This prevents burning and ensures a smooth caramel.
Step 7: Cooking the Caramel
Reduce heat slightly.
Cook the caramel for approximately 8 to 10 minutes.
Stir constantly with a wooden spoon.
As the caramel cooks, it will thicken gradually.
The color will deepen to a rich golden brown.
The texture should become smooth and luxurious.
A properly cooked caramel will pull away slightly from the sides of the pan.
Add vanilla extract and sea salt.
Stir thoroughly.
Step 8: Testing the Caramel
The caramel is ready when:
It has thickened noticeably.
It coats the back of a spoon.
It maintains a smooth consistency.
It has developed a rich golden color.
Do not undercook the caramel.
Undercooked caramel may remain too soft.
Do not overcook the caramel.
Overcooked caramel may become hard.
Step 9: Adding the Caramel Layer
Pour the hot caramel over the cooled shortbread base.
Spread evenly using an offset spatula.
Work quickly before the caramel begins setting.
Tap the pan gently on the counter.
This helps remove air bubbles.
Allow the caramel layer to cool for approximately 30 minutes.
Then refrigerate for 1 hour.
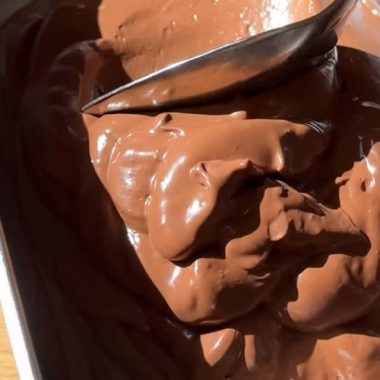
Step 10: Preparing the Chocolate Topping
Chop the milk chocolate and dark chocolate into small pieces.
Place in a heatproof bowl.
Add the butter.
Melt using a double boiler.
Alternatively, microwave in short intervals.
Stir frequently until completely smooth.
The mixture should appear glossy and silky.
Step 11: Tempering for Better Results
For a professional finish, allow the melted chocolate to cool slightly.
This helps reduce cracking when slicing.
The chocolate should remain fluid but not excessively warm.
Patience during this step improves the final texture significantly.
Step 12: Applying the Chocolate Layer
Remove the chilled caramel layer from the refrigerator.
Pour the melted chocolate over the caramel.
Spread evenly.
Use an offset spatula to create a perfectly smooth surface.
Tap the pan gently to eliminate air bubbles.
If desired, create decorative swirls with a spoon.
Step 13: Decorating the Top
While the chocolate remains soft, add optional decorations.
Sprinkle sea salt flakes.
Add chocolate curls.
Drizzle caramel.
Scatter chocolate shavings.
Decorations should complement rather than overwhelm the dessert.
Step 14: Chilling the Dessert
Place the pan into the refrigerator.
Allow to chill for at least 2 to 3 hours.
The chocolate should become fully set.
The caramel should firm up.
Proper chilling ensures clean slices.
Step 15: Cutting Perfect Squares
Remove the dessert from the refrigerator.
Allow it to sit at room temperature for approximately 15 minutes.
This softens the chocolate slightly.
Use a sharp knife.
Warm the knife under hot water.
Dry thoroughly before each cut.
Slice into squares or rectangles.
Clean the knife between cuts for the neatest appearance.
Serving Suggestions
Serve with coffee.
Pair with tea.
Enjoy alongside hot chocolate.
Serve as part of a dessert platter.
Include on holiday dessert tables.
Package as homemade gifts.
Serve after dinner as an elegant sweet treat.
Storage Instructions
Store in an airtight container.
Keep refrigerated for up to 7 days.
Separate layers with parchment paper if stacking.
Bring to room temperature for 10 minutes before serving.
This improves texture and flavor.
Freezing Instructions
Millionaire’s Shortbread freezes exceptionally well.
Wrap individual pieces tightly.
Store in airtight containers.
Freeze for up to 3 months.
Thaw overnight in the refrigerator.
Serve once fully thawed.
Common Mistakes to Avoid
Overbaking the shortbread.
Undercooking the caramel.
Burning the caramel.
Pouring chocolate onto warm caramel.
Skipping chilling time.
Using low-quality chocolate.
Cutting before fully set.
Rushing any of these steps can affect the final result.
Professional Baker’s Tips
Use real butter throughout the recipe.
Choose high-quality chocolate.
Stir caramel continuously.
Use a heavy-bottom saucepan.
Allow each layer to cool properly before adding the next.
Warm the knife between cuts.
Store chilled for the cleanest presentation.
Measure ingredients accurately.
Patience is one of the most important ingredients in this dessert.
Flavor Variations
Salted Caramel Millionaire’s Shortbread
Increase the sea salt.
Finish with flaky salt on top.
This variation balances sweetness beautifully.
Dark Chocolate Version
Use all dark chocolate.
Creates a richer and less sweet dessert.
White Chocolate Millionaire’s Shortbread
Replace the chocolate topping with white chocolate.
Produces a sweeter and creamier finish.
Peanut Butter Millionaire’s Shortbread
Add peanut butter to the caramel layer.
Top with chopped peanuts.
Espresso Millionaire’s Shortbread
Add espresso powder to the caramel.
Enhances the richness of the chocolate.
Nutritional Overview
Millionaire’s Shortbread is an indulgent dessert designed for special occasions and celebrations.
The butter contributes richness.
The caramel provides sweetness and chewiness.
The chocolate adds depth and luxurious flavor.
A small square is often enough to satisfy even the strongest sweet craving.
Why This Dessert Is So Popular
The appeal of Millionaire’s Shortbread lies in its contrast of textures.
The crisp buttery shortbread.
The soft, chewy caramel.
The smooth chocolate topping.
Together they create a dessert that feels luxurious and satisfying.
Its elegant appearance also makes it ideal for entertaining and gifting.
Conclusion
Homemade Millionaire’s Shortbread is a timeless dessert that combines three classic elements into one extraordinary treat. The buttery shortbread base provides the perfect foundation for the rich caramel center, while the glossy chocolate topping adds the finishing touch. Every bite delivers layers of flavor and texture that make this dessert unforgettable. Whether prepared for holidays, celebrations, afternoon tea, bake sales, or simply as a special homemade indulgence, Millionaire’s Shortbread remains one of the most rewarding and impressive desserts a home baker can make.