Ground Chicken Pizza Crust
Ground Chicken Pizza Crust is a high-protein, low-carbohydrate alternative to traditional pizza dough that has become increasingly popular among those seeking healthier meal options. Instead of using flour-based dough, this crust is made primarily from seasoned ground chicken, cheese, and simple binders that create a sturdy, flavorful base capable of holding a variety of pizza toppings.
The result is a delicious pizza with a crispy exterior, tender interior, and rich savory flavor. Unlike many alternative pizza crusts that can become soggy or fragile, a properly prepared ground chicken crust remains firm enough to support generous toppings while delivering exceptional taste and texture.
This recipe creates one large pizza measuring approximately 12 to 14 inches and serves 4 to 6 people.
Preparation Time
Preparation Time: 20 minutes
Cooking Time: 35 to 45 minutes
Total Time: Approximately 1 hour
Servings: 4 to 6
Difficulty Level: Easy
Why Make a Ground Chicken Pizza Crust?
There are several reasons why this pizza crust has become so popular.
It is naturally high in protein.
It contains significantly fewer carbohydrates than traditional pizza dough.
It is gluten-free.
It is easy to customize.
It can be prepared ahead of time.
It creates a filling and satisfying meal.
Many people discover that this crust not only meets dietary goals but also provides a surprisingly delicious alternative to conventional pizza.
Ingredients
For the Chicken Crust
2 pounds ground chicken
1 cup shredded mozzarella cheese
½ cup grated Parmesan cheese
2 large eggs
2 teaspoons Italian seasoning
1 teaspoon garlic powder
1 teaspoon onion powder
1 teaspoon paprika
1 teaspoon salt
½ teaspoon black pepper
1 teaspoon dried oregano
1 teaspoon dried basil
1 tablespoon olive oil
For the Pizza Sauce
1 cup pizza sauce
1 teaspoon garlic powder
½ teaspoon oregano
½ teaspoon basil
For the Cheese Topping
2 cups shredded mozzarella cheese
½ cup grated Parmesan cheese
Optional Toppings
Sliced mushrooms
Bell peppers
Red onions
Black olives
Spinach
Jalapeños
Cooked bacon
Pepperoni
Italian sausage
Grilled chicken
Fresh basil
Cherry tomatoes
Equipment Needed
Large mixing bowl
Baking sheet
Parchment paper
Pizza pan or sheet pan
Measuring cups
Measuring spoons
Spatula
Knife
Cutting board
Cooling rack
Pizza cutter
Understanding the Ingredients
Ground chicken serves as the primary structure of the crust.
Mozzarella provides binding power and elasticity.
Parmesan contributes flavor and helps develop a golden crust.
Eggs help hold everything together.
Seasonings ensure the crust is flavorful enough to stand on its own.
Each ingredient contributes to a balanced texture and taste.
Step 1: Preparing the Baking Surface
Preheat the oven to 425°F (220°C).
Line a large baking sheet or pizza pan with parchment paper.
Lightly grease the parchment with olive oil.
This prevents sticking and promotes even browning.
A properly prepared surface makes removing the crust much easier later.
Step 2: Preparing the Ground Chicken Mixture
Place the ground chicken into a large mixing bowl.
Add:
Mozzarella cheese
Parmesan cheese
Eggs
Italian seasoning
Garlic powder
Onion powder
Paprika
Salt
Black pepper
Oregano
Basil
Mix thoroughly using clean hands or a sturdy spoon.
Continue mixing until all ingredients are evenly distributed.
The mixture should become cohesive and slightly sticky.
Avoid overmixing, as excessive handling can make the finished crust dense.
Step 3: Shaping the Crust
Transfer the chicken mixture onto the prepared parchment paper.
Using your hands or a spatula, spread the mixture into a circular pizza shape.
Aim for approximately 12 to 14 inches in diameter.
Keep the thickness relatively even.
A thickness of about ¼ to ⅓ inch works best.
If certain areas are too thick, they may remain soft.
If certain areas are too thin, they may become overly crisp.
Create slightly raised edges around the perimeter.
These edges help contain sauce and toppings later.
Step 4: Smoothing the Surface
Dip your hands lightly in water.
Gently smooth the top of the crust.
This creates a more uniform appearance and encourages even cooking.
Take time during this step.
Proper shaping contributes significantly to the final presentation.
Step 5: First Bake
Place the crust into the preheated oven.
Bake for approximately 20 to 25 minutes.
The surface should become golden brown.
The edges should begin developing deeper color.
The chicken must be fully cooked before adding toppings.
An internal temperature of 165°F (74°C) confirms doneness.
Step 6: Removing Excess Moisture
Once baked, carefully remove the crust from the oven.
Ground chicken naturally releases moisture during cooking.
If excess liquid has accumulated, gently blot the surface using paper towels.
Removing excess moisture helps maintain a crisp texture.
This step is especially important for heavily topped pizzas.
Step 7: Optional Flipping Technique
For an even crispier crust, carefully place another sheet of parchment over the crust.
Invert onto a second baking sheet.
Remove the original parchment paper.
Return the crust to the oven for an additional 5 to 8 minutes.
This optional step creates a more evenly browned bottom surface.
Step 8: Preparing the Sauce
While the crust bakes, prepare the sauce.
In a small bowl combine:
Pizza sauce
Garlic powder
Oregano
Basil
Mix thoroughly.
This simple seasoning adjustment enhances the overall flavor of the finished pizza.
Step 9: Applying the Sauce
Remove the baked crust from the oven.
Allow it to cool for 3 to 5 minutes.
Spread the pizza sauce evenly over the surface.
Leave approximately ½ inch around the edges.
Avoid using excessive sauce.
Too much sauce may soften the crust.
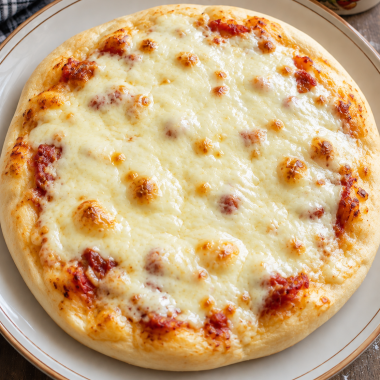
Step 10: Adding the Cheese
Sprinkle mozzarella cheese evenly across the sauce.
Follow with Parmesan cheese.
Ensure even coverage for consistent melting.
The cheese layer acts as the foundation for any additional toppings.
Step 11: Adding Additional Toppings
Arrange desired toppings evenly.
Popular combinations include:
Mushrooms and spinach
Pepperoni and mozzarella
Chicken and peppers
Italian sausage and onions
Bacon and jalapeños
Vegetable medley
Avoid overloading the pizza.
Excessive toppings can increase moisture and affect texture.
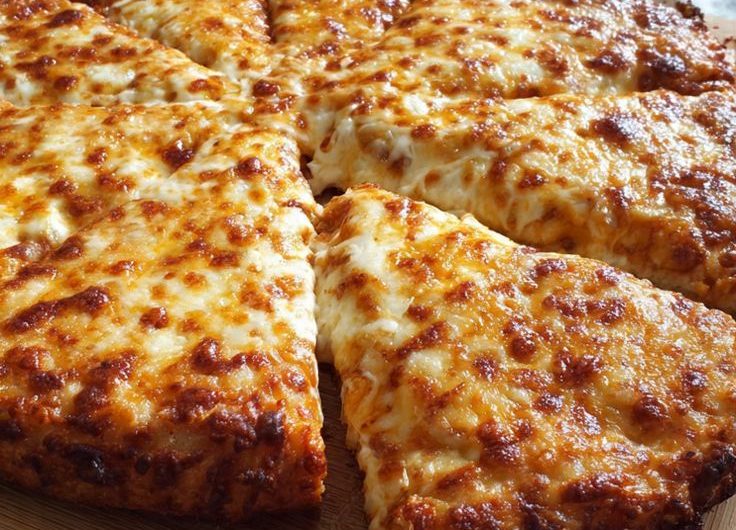
Step 12: Final Bake
Return the pizza to the oven.
Bake for 10 to 15 minutes.
The cheese should melt completely.
The surface should become bubbly and lightly golden.
The edges should develop additional color.
Monitor closely during the final minutes.
Step 13: Broiling for Extra Color
If desired, switch to broil for 1 to 2 minutes.
This creates attractive golden spots on the cheese.
Watch carefully to prevent burning.
Broiling can quickly transform a good pizza into a spectacular one.
Step 14: Resting Before Slicing
Remove the pizza from the oven.
Allow it to rest for approximately 5 to 10 minutes.
Resting helps the cheese set.
It also makes slicing cleaner and easier.
This brief waiting period improves texture significantly.
Step 15: Garnishing
Before serving, consider adding:
Fresh basil
Cracked black pepper
Parmesan cheese
Red pepper flakes
Fresh herbs
These finishing touches enhance both flavor and presentation.
Serving Suggestions
Serve with a fresh green salad.
Pair with roasted vegetables.
Accompany with garlic green beans.
Serve alongside cucumber salad.
Enjoy with a light tomato soup.
The pizza is filling enough to function as a complete meal.
Storage Instructions
Allow leftovers to cool completely.
Store in airtight containers.
Refrigerate for up to 4 days.
Separate slices with parchment paper if stacking.
Reheating Instructions
For best results, reheat in an oven at 375°F (190°C) for 8 to 10 minutes.
An air fryer also works exceptionally well.
Avoid microwaving whenever possible.
The oven preserves crispness more effectively.
Freezing Instructions
The crust can be frozen before adding toppings.
Bake the crust completely.
Cool thoroughly.
Wrap tightly in plastic wrap and foil.
Freeze for up to 3 months.
Thaw overnight before topping and baking.
Flavor Variations
Buffalo Chicken Pizza
Add buffalo sauce to the crust mixture.
Top with mozzarella and blue cheese.
Finish with green onions.
Mediterranean Pizza
Top with olives, spinach, tomatoes, and feta cheese.
Add oregano and fresh parsley.
Barbecue Chicken Pizza
Use barbecue sauce instead of pizza sauce.
Top with chicken, onions, and mozzarella.
Meat Lover’s Pizza
Add pepperoni, sausage, bacon, and extra cheese.
Margherita Style
Use fresh mozzarella.
Add sliced tomatoes.
Finish with fresh basil leaves.
Common Mistakes to Avoid
Using extra-lean chicken without additional moisture.
Making the crust too thick.
Adding excessive sauce.
Overloading toppings.
Skipping the first bake.
Not removing excess moisture.
Cutting immediately after baking.
Each of these mistakes can affect the final texture and stability.
Nutritional Benefits
Ground chicken provides substantial protein.
The crust is naturally lower in carbohydrates than traditional pizza dough.
Cheese contributes calcium and protein.
The recipe can easily fit into various low-carbohydrate and high-protein eating plans.
Vegetable toppings further increase nutritional value.
Professional Tips for Success
Use freshly grated cheese whenever possible.
Choose quality ground chicken.
Bake the crust completely before topping.
Keep toppings balanced.
Allow proper resting time.
Season the crust generously.
Use parchment paper for easy handling.
Monitor moisture carefully throughout cooking.
Conclusion
Ground Chicken Pizza Crust is a flavorful, satisfying, and protein-rich alternative to traditional pizza dough. With its crispy edges, tender interior, and ability to support a wide range of toppings, it offers all the enjoyment of pizza while providing a unique nutritional profile. Whether you are seeking a gluten-free option, a lower-carbohydrate meal, or simply a creative new way to enjoy pizza night, this crust delivers exceptional results. The combination of seasoned chicken, melted cheese, and favorite toppings creates a delicious meal that proves healthy alternatives can be every bit as enjoyable as the original.