A well-made gluten-free pizza crust can be every bit as delicious as traditional pizza dough. The secret lies in creating a dough that balances structure, flexibility, flavor, and crispness without relying on gluten. This recipe produces a crust that is crispy on the outside, tender on the inside, and sturdy enough to support generous toppings while maintaining an authentic pizza texture.
Unlike many gluten-free crusts that can be dry, crumbly, or dense, this recipe uses a carefully balanced blend of gluten-free flours, starches, yeast, and binders to create a dough that rises beautifully and bakes into a flavorful crust. Whether you are following a gluten-free lifestyle due to celiac disease, gluten sensitivity, or personal preference, this pizza crust delivers excellent results.
This recipe makes one large 12 to 14-inch pizza or two smaller pizzas.
Preparation Time
Preparation Time: 25 minutes
Rising Time: 1 hour
Baking Time: 18 to 25 minutes
Total Time: Approximately 2 hours
Servings: 6 to 8
Difficulty Level: Intermediate
Understanding Gluten-Free Dough
Traditional pizza dough relies on gluten to create elasticity and structure. Gluten-free dough requires alternative ingredients to mimic these qualities.
The combination of rice flour, tapioca starch, potato starch, and xanthan gum helps create a dough that is flexible enough to handle while maintaining strength during baking.
Unlike traditional pizza dough, gluten-free dough is often softer and more batter-like. Proper hydration and handling techniques are essential for success.
Ingredients
For the Dough
2 cups gluten-free all-purpose flour blend
1 cup white rice flour
½ cup tapioca starch
½ cup potato starch
2 teaspoons xanthan gum
2¼ teaspoons active dry yeast
1 tablespoon granulated sugar
1½ teaspoons fine sea salt
1½ cups warm water (approximately 110°F or 43°C)
2 tablespoons olive oil
2 large eggs
1 teaspoon apple cider vinegar
For Brushing the Crust
1 tablespoon olive oil
½ teaspoon garlic powder
½ teaspoon dried oregano
Optional Pizza Toppings
Pizza sauce
Mozzarella cheese
Parmesan cheese
Fresh basil
Bell peppers
Mushrooms
Onions
Olives
Pepperoni
Cooked sausage
Grilled chicken
Spinach
Cherry tomatoes
Equipment Needed
Large mixing bowl
Stand mixer or hand mixer
Measuring cups
Measuring spoons
Pizza pan
Parchment paper
Plastic wrap
Kitchen towel
Spatula
Wire cooling rack
Pizza cutter
Step 1: Activating the Yeast
Pour the warm water into a mixing bowl.
Add the sugar.
Sprinkle the yeast over the water.
Allow the mixture to sit for approximately 5 to 10 minutes.
The surface should become foamy.
This indicates that the yeast is active and ready to use.
If no foam develops, the yeast may be expired or the water may have been too hot or too cold.
Step 2: Preparing the Dry Ingredients
In a separate large bowl combine:
Gluten-free flour blend
Rice flour
Tapioca starch
Potato starch
Xanthan gum
Salt
Whisk thoroughly.
Proper distribution of the xanthan gum is important because it helps provide structure throughout the dough.
Step 3: Combining Wet Ingredients
To the activated yeast mixture add:
Olive oil
Eggs
Apple cider vinegar
Whisk until fully combined.
The eggs contribute richness and help improve the texture of the finished crust.
The vinegar enhances flavor and supports yeast activity.
Step 4: Creating the Dough
Gradually add the dry ingredients into the wet ingredients.
Mix continuously using a stand mixer fitted with a paddle attachment or a hand mixer.
Continue mixing for approximately 5 minutes.
Unlike traditional dough, gluten-free dough does not require kneading.
The dough should resemble a very thick batter.
It will be softer and stickier than conventional pizza dough.
This is completely normal.
Step 5: First Rise
Cover the bowl with plastic wrap.
Place a kitchen towel over the top.
Allow the dough to rise in a warm location for approximately 60 minutes.
The dough should increase noticeably in volume.
Although gluten-free dough may not double in size like traditional dough, it should appear puffier and lighter.
Step 6: Preparing the Pizza Pan
Line a pizza pan or baking sheet with parchment paper.
Lightly grease the parchment with olive oil.
This prevents sticking and encourages browning.
Preheat the oven to 450°F (230°C).
Allow the oven to fully preheat before baking.
A hot oven is critical for achieving a crispy crust.
Step 7: Shaping the Dough
Transfer the risen dough onto the prepared parchment paper.
Lightly oil your hands.
Gently spread the dough into a circular pizza shape.
Aim for approximately 12 to 14 inches in diameter.
Keep the thickness relatively even.
Create a slightly thicker edge around the perimeter to form the crust.
Because gluten-free dough is soft, shaping is done by pressing rather than stretching.
Take your time to create a smooth, even surface.
Step 8: Resting the Shaped Dough
Allow the shaped dough to rest for approximately 10 to 15 minutes.
This brief rest helps relax the dough and improves its texture during baking.
Meanwhile, prepare any toppings you plan to use.
Step 9: Pre-Baking the Crust
Place the shaped crust into the preheated oven.
Bake for approximately 10 to 12 minutes.
The surface should begin to set.
The edges should show light golden coloring.
Pre-baking is extremely important for gluten-free pizza.
This step prevents a soggy center and ensures a crisp foundation.
Step 10: Preparing the Crust Surface
Remove the crust from the oven.
Brush the surface lightly with olive oil.
Sprinkle garlic powder and oregano over the edges.
This simple step adds flavor and promotes attractive browning.
Step 11: Adding Sauce
Spread pizza sauce evenly across the surface.
Leave approximately one inch around the edge.
Avoid excessive sauce.
Too much sauce can soften the crust.
A thin, even layer produces the best texture.
Step 12: Adding Cheese
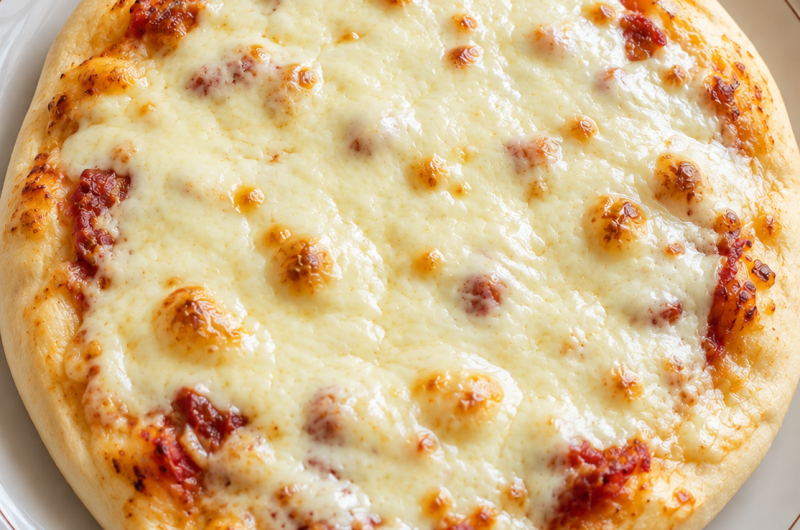
Sprinkle mozzarella cheese evenly over the sauce.
Add Parmesan cheese if desired.
Ensure even distribution for consistent melting.
The cheese layer helps protect the crust from moisture.
Step 13: Adding Toppings
Arrange desired toppings evenly.
Popular combinations include:
Margherita with basil and fresh mozzarella
Vegetable pizza with peppers, onions, and mushrooms
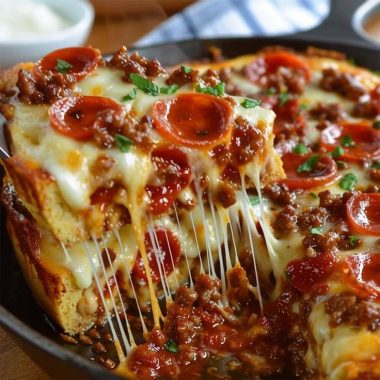
Meat lover’s pizza with pepperoni and sausage
Chicken and spinach pizza
Mediterranean-style pizza with olives and feta
Do not overload the pizza.
Too many toppings can make the crust difficult to cook evenly.
Step 14: Final Bake
Return the pizza to the oven.
Bake for approximately 10 to 15 minutes.
The cheese should melt completely.
The edges should become golden brown.
The bottom should develop a crisp texture.
The pizza is ready when the cheese is bubbling and lightly browned.
Step 15: Cooling Before Slicing
Remove the pizza from the oven.
Allow it to rest for approximately 5 minutes.
This brief cooling period helps the cheese set and makes slicing easier.
Transfer carefully to a cutting board.
Step 16: Slicing and Serving
Use a sharp pizza cutter.
Cut into slices.
Serve immediately while hot.
The crust should be crisp on the outside and tender inside.
The flavor will continue to develop as it cools slightly.
Storage Instructions
Allow leftovers to cool completely.
Store in an airtight container.
Refrigerate for up to 4 days.
Separate slices with parchment paper if stacking.
Reheating Instructions
Reheat in a 375°F (190°C) oven for approximately 8 minutes.
An air fryer also works well.
Avoid microwaving whenever possible.
The oven preserves crispness much better.
Freezing Instructions
The crust can be frozen before or after baking.
Wrap tightly in plastic wrap.
Place in a freezer-safe container.
Freeze for up to 3 months.
Thaw overnight in the refrigerator before reheating.
Variations
Herb Crust
Add:
1 teaspoon dried basil
1 teaspoon oregano
½ teaspoon rosemary
Mix directly into the dough.
Garlic Parmesan Crust
Add Parmesan cheese to the dough.
Brush the edges with garlic butter before baking.
Thin-Crust Version
Spread the dough thinner.
Increase pre-baking time slightly.
Produces a crispier texture.
Deep-Dish Style
Use a smaller pan.
Create a thicker crust.
Increase baking time by approximately 5 to 10 minutes.
Common Mistakes to Avoid
Skipping xanthan gum.
Using cold water with the yeast.
Adding too much flour.
Overloading toppings.
Skipping the pre-bake.
Not fully preheating the oven.
Using expired yeast.
Each of these can negatively affect the final texture.
Professional Tips for Success
Measure ingredients carefully.
Use room-temperature eggs.
Allow sufficient rising time.
Pre-bake the crust every time.
Use quality gluten-free flour blends.
Keep the dough well hydrated.
Bake on a preheated pizza stone if available.
Use parchment paper for easy handling.
Monitor closely during the final bake.
Nutritional Benefits
This gluten-free crust allows those avoiding gluten to enjoy pizza comfortably.
Rice flour provides structure.
Potato starch contributes tenderness.
Tapioca starch helps create elasticity.
Eggs add protein and richness.
Olive oil contributes healthy fats and flavor.
The crust can be customized with nutritious toppings to create a balanced meal.
Conclusion
This Gluten-Free Pizza Crust recipe delivers a flavorful, sturdy, and satisfying foundation for all your favorite pizza creations. With its crispy exterior, tender interior, and authentic pizza flavor, it proves that gluten-free baking can produce exceptional results. Whether topped with classic mozzarella and tomato sauce or loaded with gourmet ingredients, this crust provides a dependable and delicious base that rivals traditional pizza dough. Once mastered, it can become a staple recipe for family dinners, gatherings, and homemade pizza nights throughout the year.