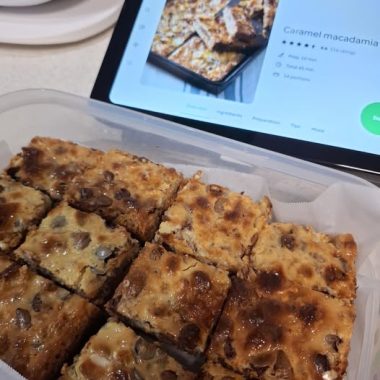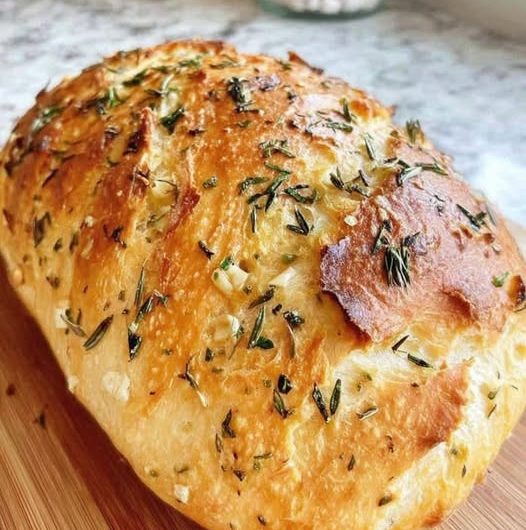
No-Knead Gluten-Free Bread
There is something deeply satisfying about baking a loaf of bread with minimal effort and simple ingredients. This no-knead gluten-free bread recipe is designed for anyone who wants a soft, flavorful loaf with a tender crumb and a beautifully golden crust, without the work of kneading. The long resting time allows the ingredients to fully hydrate, creating excellent texture and flavor while keeping the process easy and approachable.
This bread is perfect for sandwiches, toast, soups, breakfast spreads, and everyday meals. The recipe uses a balanced blend of gluten-free flours and starches to mimic the structure that gluten normally provides. Psyllium husk helps create elasticity and moisture retention, producing a loaf that slices beautifully and stays fresh longer.
Preparation Time
Preparation Time: 20 minutes
First Rise: 1½ to 2 hours
Second Rise: 30 to 45 minutes
Baking Time: 50 to 60 minutes
Cooling Time: 2 hours
Total Time: Approximately 5 hours
Ingredients
2 cups gluten-free bread flour blend
1 cup brown rice flour
1 cup tapioca starch
¼ cup potato starch
3 tablespoons psyllium husk powder
2 teaspoons instant yeast
1 tablespoon sugar or honey
2 teaspoons fine sea salt
2 tablespoons olive oil
2 cups warm water
1 teaspoon apple cider vinegar
Optional Flavor Enhancers
1 tablespoon mixed seeds
1 teaspoon dried rosemary
1 teaspoon dried thyme
1 tablespoon flaxseeds
1 tablespoon sunflower seeds
Equipment
Large mixing bowl
Wooden spoon or sturdy spatula
9 x 5 inch loaf pan
Parchment paper
Kitchen towel
Wire cooling rack
Preparing the Dough
In a large mixing bowl, combine the gluten-free flour blend, brown rice flour, tapioca starch, potato starch, psyllium husk powder, instant yeast, sugar, and salt. Stir thoroughly to distribute all ingredients evenly.
In a separate bowl or measuring jug, combine the warm water, olive oil, and apple cider vinegar. Mix gently.
Pour the liquid ingredients into the dry ingredients. Using a wooden spoon or spatula, stir until everything is fully combined. The dough will appear wetter than traditional wheat bread dough. This is completely normal.
Continue mixing for about three to four minutes to ensure there are no dry pockets of flour remaining. The dough should resemble a very thick batter rather than a kneadable dough.
If using herbs or seeds, fold them into the mixture at this stage.
First Rise
Cover the bowl with a clean kitchen towel or plastic wrap.
Place the bowl in a warm draft-free area.
Allow the dough to rise for 1½ to 2 hours.
During this period, the yeast becomes active, creating air pockets throughout the dough. The psyllium husk absorbs moisture and develops a structure that helps the bread maintain its shape.
The dough should increase noticeably in volume and appear puffy.
Preparing the Pan
Line a loaf pan with parchment paper.
Lightly grease the paper and exposed sides of the pan with olive oil.
This step prevents sticking and makes removing the baked loaf much easier.
Shaping the Dough
Unlike traditional wheat dough, gluten-free dough does not require kneading.
Using a spatula, gently transfer the risen dough into the prepared loaf pan.
Smooth the top with slightly damp hands or a wet spatula.
If desired, sprinkle extra seeds on top for decoration and texture.
Second Rise
Cover the loaf pan loosely with a towel.
Allow the dough to rise again for 30 to 45 minutes.
The loaf should become slightly larger and develop a rounded appearance.
Avoid over-proofing, as gluten-free dough can lose structure if left too long.
Preheating the Oven
About 20 minutes before baking, preheat the oven to 220°C (425°F).
A fully preheated oven helps create a strong initial rise and promotes good crust development.
Baking the Bread
Place the loaf pan on the center rack of the oven.
Bake for 20 minutes at 220°C (425°F).
Reduce the oven temperature to 190°C (375°F).
Continue baking for another 30 to 40 minutes.
The loaf should become deep golden brown and sound hollow when tapped gently.
An internal temperature of approximately 96°C (205°F) indicates that the bread is fully baked.
Creating a Better Crust
For a bakery-style crust, place a small oven-safe dish filled with hot water on the bottom rack during baking.
The steam helps improve oven spring and creates a crisp exterior.
For an even darker crust, remove the loaf from the pan during the last 10 minutes of baking and place it directly on the oven rack.
Cooling
Remove the bread from the oven.
Transfer it immediately to a wire rack.
Allow the loaf to cool completely for at least two hours.
Although it can be tempting to slice into warm bread, gluten-free loaves continue setting internally as they cool. Cutting too soon may result in a gummy texture.
Texture and Flavor
This bread has a soft interior with a slightly chewy texture that closely resembles artisan wheat bread.
The crust becomes pleasantly crisp while the inside remains moist and tender.
The flavor is mild and versatile, making it suitable for both sweet and savory toppings.
Serving Suggestions
Serve toasted with butter and jam.
Use for grilled cheese sandwiches.
Pair with soups and stews.
Top with avocado and eggs for breakfast.
Serve alongside salads and roasted vegetables.
Make French toast from slightly stale slices.
Storage
Store the cooled loaf in an airtight container at room temperature for up to three days.
For longer storage, refrigerate for up to one week.
Slices can be frozen individually for up to three months.
To reheat, toast directly from frozen or warm in the oven until heated through.
Tips for Success
Measure ingredients accurately using kitchen scales whenever possible.
Do not substitute psyllium husk with other ingredients unless the recipe is reformulated.
Use fresh yeast for the best rise.
Allow adequate cooling time before slicing.
If the dough appears too thick, add a few tablespoons of water.
If it appears too thin, add a small amount of gluten-free flour blend.
Every gluten-free flour blend absorbs moisture differently, so small adjustments may occasionally be necessary.
The result is a hearty, flavorful, no-knead gluten-free bread that delivers excellent texture, beautiful slices, and reliable results with very little hands-on effort. Whether used for toast in the morning or sandwiches throughout the day, this loaf is a dependable homemade staple that showcases how delicious gluten-free baking can be.