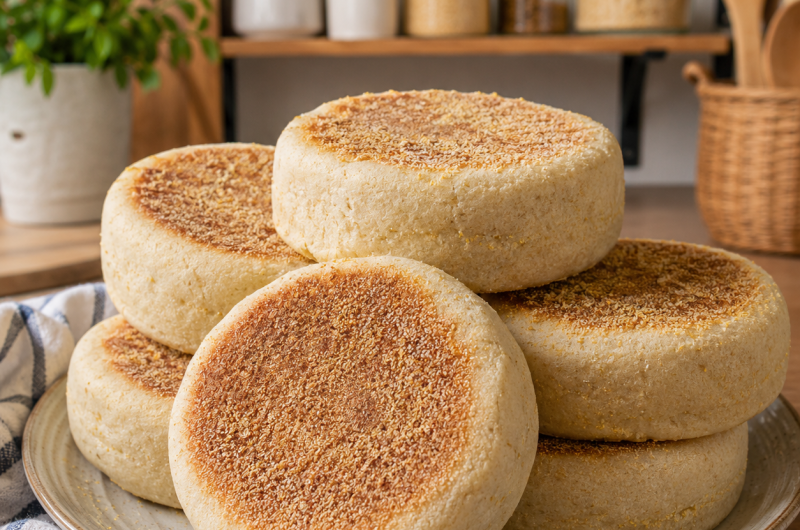
If you have been searching for the best gluten free English muffins, this recipe is everything you need. These homemade English muffins are soft, fluffy, and filled with the classic nooks and crannies that make them perfect for butter, jam, or your favorite breakfast toppings. Unlike many gluten-free bread recipes that are dry or crumbly, these muffins have a light texture, a beautifully golden crust, and an interior that stays tender for days. They are prepared entirely on the stovetop, so there is no need to bake them in the oven. Whether you are following a gluten-free lifestyle or simply enjoy making fresh bread from scratch, this recipe delivers bakery-style results with simple ingredients and reliable techniques.
Why These Gluten Free English Muffins Are So Popular
English muffins are one of the most loved breakfast breads because they are versatile, easy to serve, and perfect for both sweet and savory meals. Creating a gluten-free version with the same airy texture can be challenging, but this recipe succeeds by combining gluten-free flours, starches, psyllium husk, and yeast into a dough that behaves much like traditional bread dough. The finished muffins are soft enough to split easily with a fork while still holding their shape for sandwiches, breakfast burgers, or toasted snacks. Their excellent texture and flavor make them suitable for everyone, whether they follow a gluten-free diet or not.
What Makes These English Muffins Different
Many gluten-free breads become dense, dry, or fragile after cooling. These English muffins are different because they remain soft and flexible thanks to the balanced combination of starches and whole-grain flours. Psyllium husk creates elasticity that normally comes from gluten, while yeast develops the light texture associated with traditional English muffins. Instead of baking in an oven, the muffins cook slowly in a skillet, allowing them to develop a crisp golden exterior while remaining tender inside. This cooking method also produces the characteristic nooks and crannies that make English muffins so recognizable.
Understanding the Role of Each Flour
Every flour in this recipe serves a unique purpose. Tapioca starch provides stretch and chewiness, preventing the muffins from becoming dry or crumbly. Millet flour contributes mild flavor and structure while keeping the crumb soft and light. Sorghum flour adds body, color, and nutritional value, producing a balanced dough that closely resembles traditional wheat bread. Together, these ingredients create a harmonious gluten-free flour blend that delivers both excellent texture and dependable baking performance.
Why Psyllium Husk Is Essential
Psyllium husk is one of the most valuable ingredients in gluten-free bread baking. When mixed with lukewarm water, it quickly forms a thick gel that replaces the structural qualities of gluten. This gel traps moisture, improves elasticity, and allows the dough to stretch without breaking apart. It also helps the muffins rise during proofing while creating the soft interior that makes them ideal for toasting. Without psyllium husk, achieving this texture would be much more difficult.
Yeast Creates Light and Airy Muffins
Although these English muffins are cooked on the stovetop, yeast still plays a crucial role in developing flavor and texture. Instant yeast works directly with the flour, while active dry yeast must first be activated in warm milk with sugar. During proofing, the yeast releases carbon dioxide, creating tiny air pockets that become the famous nooks and crannies inside each muffin. This natural fermentation also enhances the overall flavor, giving the bread a pleasant depth that cannot be achieved with chemical leavening alone.
Why Lukewarm Ingredients Matter
Using lukewarm water and milk encourages proper yeast activity while helping the psyllium hydrate efficiently. Liquids that are too cold may slow yeast development, while excessively hot liquids can damage the yeast and reduce its effectiveness. Bringing the ingredients to a comfortably warm temperature creates ideal conditions for fermentation, resulting in a softer dough and a better rise during proofing.
Building a Smooth and Flexible Dough
The dough comes together by combining the prepared psyllium gel with the dry ingredients, milk, oil, and apple cider vinegar. Mixing thoroughly ensures every ingredient is evenly incorporated. The finished dough should feel smooth, slightly sticky, and easy to handle. Unlike many gluten-free recipes, there is no need to add excessive flour during kneading. Maintaining the correct moisture level helps produce English muffins that remain tender after cooking rather than becoming dense or dry.
Why Apple Cider Vinegar Improves Bread
Apple cider vinegar may seem like a small addition, but it has several important functions. It supports yeast activity, enhances flavor, and contributes to a softer crumb. Its mild acidity also strengthens the dough structure, improving both proofing and the finished texture. Because only a small quantity is used, it does not create a noticeable vinegar taste but instead quietly improves the overall quality of the bread.
Shaping the English Muffins
After kneading, the dough is divided into eight equal portions and shaped into smooth balls. Pressing each portion gently creates the classic thick English muffin shape. Dusting the baking tray with cornmeal prevents sticking while giving the finished muffins their traditional appearance and slightly crisp exterior. Even sizing ensures consistent cooking, allowing every muffin to brown evenly while remaining soft in the center.
Proofing Creates Better Texture
Allowing the shaped dough to proof in a warm place for about one hour is essential for achieving light, fluffy English muffins. During this time, the yeast expands the dough, nearly doubling its size. Proper proofing produces a softer crumb with more internal air pockets, giving the muffins their signature texture. Covering the dough during proofing prevents the surface from drying out and helps maintain even moisture throughout.
Cooking Slowly on the Stovetop
One of the unique features of this recipe is that the English muffins are cooked entirely in a dry skillet instead of an oven. Cooking over low heat allows the centers to cook completely while the outside gradually develops a rich golden-brown crust. Rushing the process with higher heat may brown the exterior too quickly while leaving the inside undercooked. Patience during cooking rewards you with perfectly baked-style muffins that are evenly cooked from edge to center.
Splitting the Muffins the Traditional Way
For the best texture, English muffins should be opened with a fork instead of slicing them with a knife. Gently inserting the fork around the sides before pulling the halves apart preserves the irregular air pockets inside the bread. These famous nooks and crannies hold melted butter, fruit preserves, honey, peanut butter, or savory toppings much better than a smooth knife-cut surface. This traditional method enhances both appearance and eating experience.
Serving Ideas for Every Meal
These gluten-free English muffins are far more versatile than ordinary breakfast bread. Toast them and spread with butter, jam, cream cheese, or peanut butter for a simple morning meal. Use them as sandwich buns for eggs, cheese, bacon, or grilled vegetables. They also make an excellent base for mini pizzas, eggs Benedict, breakfast burgers, or avocado toast. Their sturdy structure allows them to support generous fillings without becoming soggy, making them suitable for breakfast, lunch, or light dinners.
Notes
Achieving the Best Results
Always prepare the psyllium gel before mixing the dough to ensure proper hydration. Resist adding extra flour even if the dough feels slightly sticky because additional flour can make the muffins dense after cooking. Allow sufficient proofing time and cook slowly over low heat to ensure the centers cook thoroughly.
Ingredient Alternatives
Tapioca starch may be replaced with equal amounts of cornstarch, potato starch, or arrowroot starch. Millet flour can be substituted with finely milled brown rice flour, while sorghum flour may be replaced with light buckwheat flour, white teff flour, or oat flour if tolerated. These substitutions allow flexibility while preserving the original structure of the recipe.
Storage and Reheating
These English muffins taste best on the day they are prepared but remain fresh in a sealed container at room temperature for two to three days. Toasting before serving refreshes the texture and restores the crisp exterior. They may also be frozen for longer storage and reheated directly from frozen using a toaster or warm skillet.
Why This Easy Gluten Free English Muffin Recipe Belongs in Your Kitchen
These Easy Gluten Free English Muffins combine outstanding flavor, soft texture, and dependable results in one simple recipe. The carefully balanced flour blend, psyllium husk, yeast, and stovetop cooking method create muffins that closely resemble traditional bakery-style English muffins. Their signature nooks and crannies, tender crumb, and golden crust make them suitable for countless sweet and savory meals. Whether enjoyed fresh with butter, toasted for breakfast sandwiches, or served alongside soups and salads, these homemade gluten-free muffins deliver exceptional quality while remaining surprisingly easy to prepare. Once you experience their soft texture and authentic flavor, they are likely to become a regular part of your homemade bread collection.
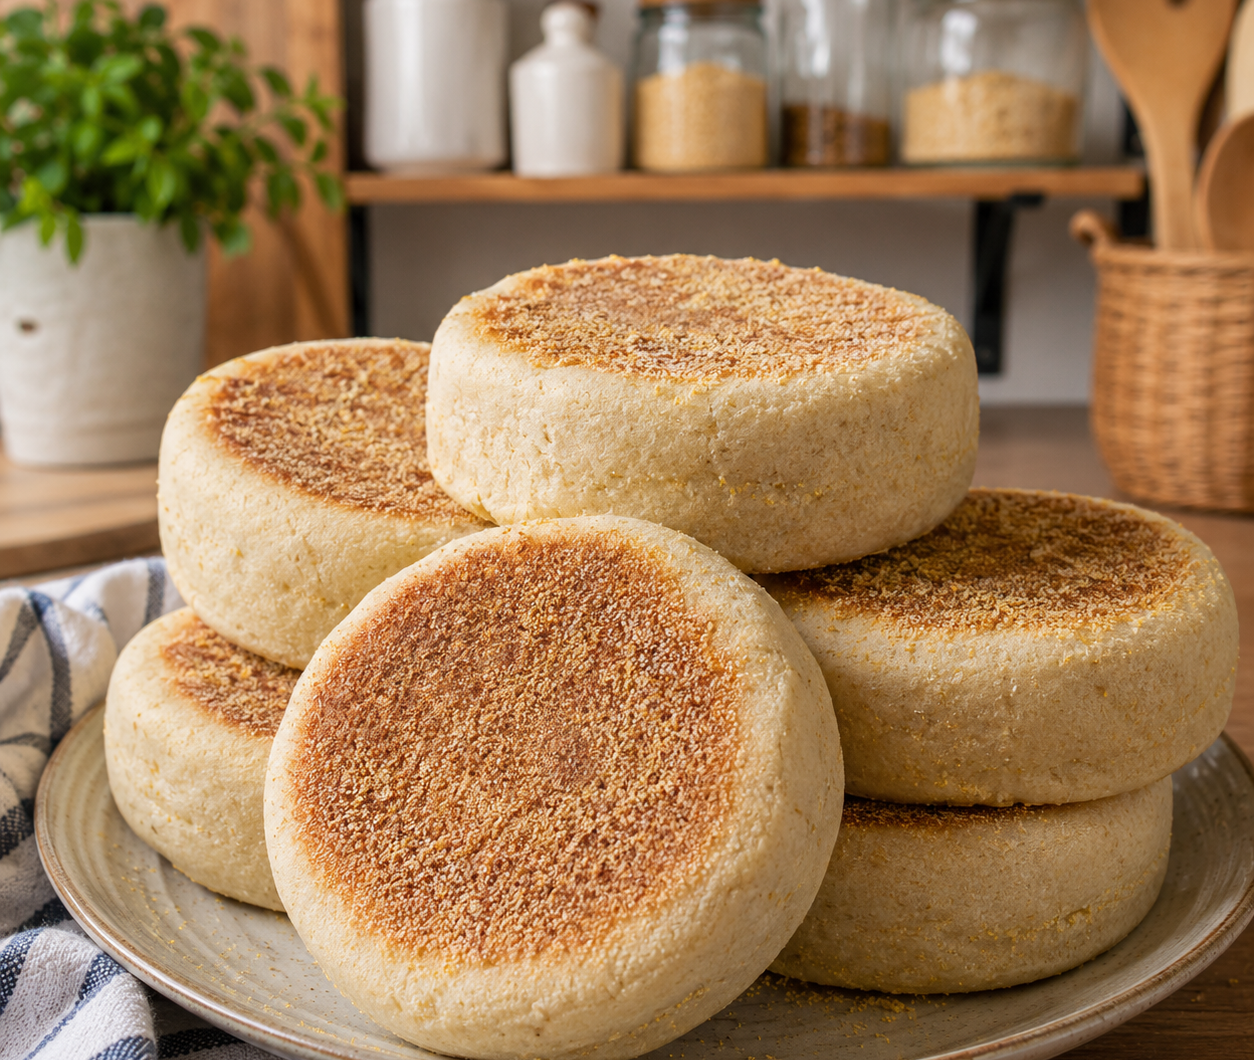
Easy Gluten Free English Muffins
Soft, fluffy, and filled with classic nooks and crannies, these homemade gluten free English muffins are cooked entirely on the stovetop for an authentic texture and golden crust.
8
servings30
minutes25
minutes220
kcal60
minutes1
hour55
minutesIngredients
- Psyllium Gel
20 g whole (rough) psyllium husk (or 17 g psyllium husk powder)
360 g (1½ cups) lukewarm water
- Dry Ingredients
160 g (1⅓ cups + 1 tbsp) tapioca starch (or equal weight cornstarch/cornflour, potato starch, or arrowroot starch)
140 g (1 cup + ½ tbsp) millet flour (or equal weight finely milled brown rice flour)
120 g (¾ cup + 3 tbsp) sorghum flour (or equal weight light buckwheat flour, white teff flour, or oat flour if tolerated)
25 g (2 tbsp) caster/superfine or granulated sugar
8 g (2½ tsp) instant yeast (or 10 g active dry yeast)
8 g (1½ tsp) salt
- Wet Ingredients
120 g (½ cup) lukewarm whole milk
20 g (1½ tbsp) sunflower oil (or another neutral-flavored oil)
10 g (2 tsp) apple cider vinegar
- For Finishing
Cornmeal, for dusting
Directions
- Combine the psyllium husk with the lukewarm water and stir until a thick gel forms.
- In a large mixing bowl, whisk together the tapioca starch, millet flour, sorghum flour, sugar, yeast, and salt.
- Mix the lukewarm milk, sunflower oil, and apple cider vinegar into the psyllium gel.
- Add the wet mixture to the dry ingredients and knead until a smooth, slightly sticky dough forms.
- Transfer the dough to a lightly floured surface and shape it into a smooth ball.
- Divide the dough into 8 equal portions (approximately 125 g each) and roll each portion into a smooth ball.
- Arrange the dough balls on a baking sheet dusted with cornmeal and gently flatten each to about 3 cm (1¼ inches) thick.
- Sprinkle the tops lightly with additional cornmeal, cover loosely with plastic wrap, and proof in a warm place for about 1 hour, or until doubled in size.
- Heat a dry cast iron skillet or frying pan over low heat.
- Carefully transfer the proofed muffins to the hot skillet and cook for 11–12 minutes on the first side until deep golden brown.
- Flip carefully and cook for another 11–12 minutes until fully cooked through.
- Transfer to a wire rack and allow the muffins to cool completely.
- Split each muffin using a fork to create the traditional nooks and crannies before serving.
Nutrition Facts
8 servings per container
- Amount Per ServingCalories220
- % Daily Value *
- Total Fat
4g
6%
- Total Carbohydrate
42g
16%
- Protein 4g 8%
* The % Daily Value tells you how much a nutrient in a serving of food contributes to a daily diet. 2,000 calories a day is used for general nutrition advice.