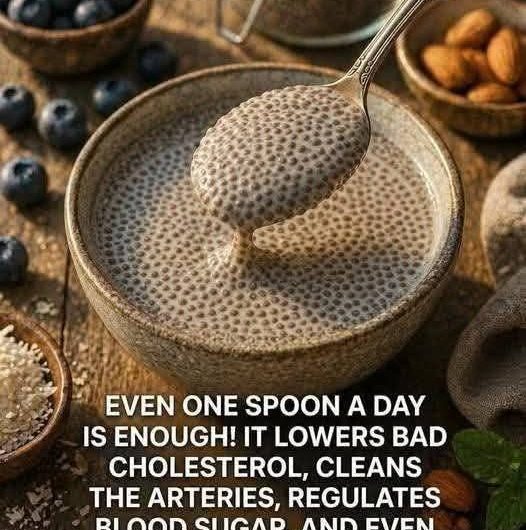
Chia Pudding (Very Detailed, Long-Form Recipe Guide)
1. Introduction
Chia pudding is a simple, no-cook dish made by soaking chia seeds in liquid until they absorb the liquid and form a thick, gel-like texture. It is commonly eaten as a breakfast, snack, or light dessert. Despite being easy to prepare, chia pudding is highly versatile and can be customized in countless ways using different liquids, sweeteners, fruits, and flavorings.
The key idea behind chia pudding is hydration. Chia seeds absorb liquid and expand many times their original size, creating a pudding-like consistency without cooking or thickening agents.
2. What Makes Chia Pudding Work
Chia seeds contain soluble fiber. When exposed to liquid, they form a gel coating that thickens the mixture naturally. This process takes time, usually between 2 and 8 hours depending on temperature and ratio.
Important principles:
- More liquid creates a looser pudding
- More chia seeds create a thicker pudding
- Proper stirring prevents clumps
- Time is essential for full hydration
3. Basic Ingredients
A standard chia pudding requires only a few core ingredients.
Chia seeds
- 3 tablespoons chia seeds per serving
These are the main thickening agent.
Liquid base
- 1 cup milk or milk alternative
Options include: - Dairy milk
- Almond milk
- Oat milk
- Coconut milk
- Soy milk
Each liquid changes the flavor and texture.
Sweetener (optional)
- 1 to 2 teaspoons sugar, honey, maple syrup, or other sweetener
Used to improve taste, especially if the milk is unsweetened.
Flavoring (optional)
- Vanilla extract
- Cocoa powder
- Cinnamon
- Coffee
- Fruit puree
4. Standard Chia Pudding Ratio
A reliable starting ratio is:
- 1 cup liquid
- 3 tablespoons chia seeds
This produces a medium-thick pudding. Adjusting this ratio changes texture:
- Thicker pudding: 1 cup liquid + 4 tablespoons chia seeds
- Thinner pudding: 1 cup liquid + 2 tablespoons chia seeds
5. Step-by-Step Preparation
Step 1: Choose your container
Use a jar, bowl, or sealed container. It should be large enough to allow stirring without spilling.
A glass jar is often preferred because it allows easy mixing and storage.
Step 2: Add liquid first
Pour 1 cup of your chosen milk into the container.
Adding liquid first helps prevent clumping when chia seeds are added.
Step 3: Add chia seeds gradually
Add chia seeds slowly while stirring continuously.
This is important because chia seeds clump easily if dumped all at once.
Step 4: Initial mixing
Stir thoroughly for 30 to 60 seconds.
Make sure seeds are evenly distributed and not sticking together at the bottom or sides.
Step 5: Rest and second stir
Let the mixture sit for 5 to 10 minutes, then stir again.
This second stir is critical because chia seeds begin to gel quickly and may settle.
Step 6: Refrigeration
Cover the container and place it in the refrigerator.
Minimum time:
- 2 hours
Ideal time:
- 6 to 8 hours or overnight
During this time:
- Seeds absorb liquid
- Texture thickens
- Flavor deepens
6. Texture Development Over Time
Chia pudding changes as it sits:
- First 10 minutes: watery, seeds floating
- 30 minutes: beginning to thicken
- 2 hours: semi-gel texture
- 4–8 hours: fully thick pudding
- Overnight: thickest, most stable texture
7. Flavor Variations (Detailed Options)
Vanilla chia pudding
Ingredients:
- Milk
- Chia seeds
- Vanilla extract
- Sweetener
Taste:
- Light, creamy, dessert-like
Chocolate chia pudding
Ingredients:
- Milk
- Chia seeds
- Cocoa powder
- Sweetener
Taste:
- Rich, pudding-like, similar to chocolate mousse
Coconut chia pudding
Ingredients:
- Coconut milk
- Chia seeds
- Honey or sugar
Taste:
- Tropical, creamy, slightly sweet
Coffee chia pudding
Ingredients:
- Milk
- Chia seeds
- Cold brewed coffee or espresso
- Sweetener
Taste:
- Coffee-flavored dessert breakfast
Fruit chia pudding
Ingredients:
- Milk
- Chia seeds
- Mashed strawberries, mango, or banana
Taste:
- Naturally sweet, fruity, refreshing
8. Layered Chia Pudding (Advanced Style)
Layered chia pudding looks like a dessert parfait.
How to build it:
Step 1:
Prepare chia pudding base and chill until thick.
Step 2:
Add fruit layer (pureed or chopped).
Step 3:
Add yogurt layer or whipped cream.
Step 4:
Repeat layers if desired.
Step 5:
Top with nuts, seeds, or granola.
9. Toppings (Important for Texture)
Chia pudding is often enhanced with toppings.
Common options:
- Fresh fruits
- Nuts (almonds, walnuts, cashews)
- Seeds (pumpkin, sunflower)
- Granola
- Coconut flakes
- Chocolate chips
- Peanut butter drizzle
Toppings add contrast because chia pudding alone is soft and uniform.
10. Nutritional Overview (General)
Chia pudding is often considered nutrient-dense.
Typical benefits:
- High fiber content
- Plant-based omega-3 fatty acids
- Moderate protein
- Low sugar (if unsweetened)
- Good satiety (keeps you full longer)
It is commonly used in breakfast or healthy snack routines.
11. Common Problems and Solutions
Problem: Clumpy pudding
Cause:
Chia seeds added too quickly
Solution:
Add slowly while stirring continuously and stir again after 10 minutes.
Problem: Too watery
Cause:
Not enough chia seeds or insufficient chilling time
Solution:
Add more chia seeds and let sit longer.
Problem: Too thick
Cause:
Too many chia seeds
Solution:
Add more liquid and mix well.
Problem: Seeds sinking to bottom
Cause:
No second stir
Solution:
Always stir twice—once initially and once after a few minutes.
Problem: Bland taste
Cause:
No sweetener or flavoring
Solution:
Add vanilla, cocoa, fruit, or sweetener.
12. Storage Guidelines
Chia pudding stores well.
- Refrigeration: up to 4–5 days
- Best texture: within 48 hours
- Always store in sealed container
- Stir before eating if separation occurs
13. Meal Prep Advantages
Chia pudding is widely used for meal prep because:
- It requires no cooking
- It stores well
- It is customizable
- It is portable
- It can be prepared in bulk
Many people prepare 3–5 jars at once for the week.
14. Advanced Tips for Better Results
- Use warm liquid for faster thickening
- Use full-fat milk for creamier texture
- Blend chia pudding for smooth consistency
- Let it rest overnight for best texture
- Adjust sweetness after chilling, not before
15. Serving Ideas
Chia pudding can be served:
- In jars for breakfast on the go
- In bowls as a dessert
- As layered parfaits
- With smoothie bowls
- As a base for fruit bowls
16. Final Summary
Chia pudding is a simple recipe built on one scientific principle: liquid absorption. While the ingredient list is minimal, the outcome depends on ratio, timing, and mixing technique.
The essential success steps are:
- Correct chia-to-liquid ratio
- Proper stirring twice
- Adequate chilling time
- Balanced flavoring
- Appropriate toppings
When these are done correctly, chia pudding becomes a creamy, nutritious, and highly versatile dish suitable for breakfast, snacks, or dessert.
If you want, I can make an even longer version with scientific explanation of chia gel structure, calorie breakdowns, or a full 7-day meal plan using chia pudding.