SEEDed NO-KNEAD JAR BREAD
An extended master guide to slow-fermented, seed-rich artisan bread without kneading
COMPLETE OVERVIEW
This bread is built on a simple but powerful idea: you do not need to knead dough to make excellent bread. Instead, you rely on time, water, and natural fermentation to develop structure.
Traditional kneading forces gluten to form through physical effort. In this method, gluten forms gradually as water hydrates the flour and the dough rests over many hours. This produces a bread that is often more flavorful, more aromatic, and more digestible.
Seeds are added not just for taste but also for texture and nutrition. They create contrast in every bite and make the bread feel more complete and wholesome.
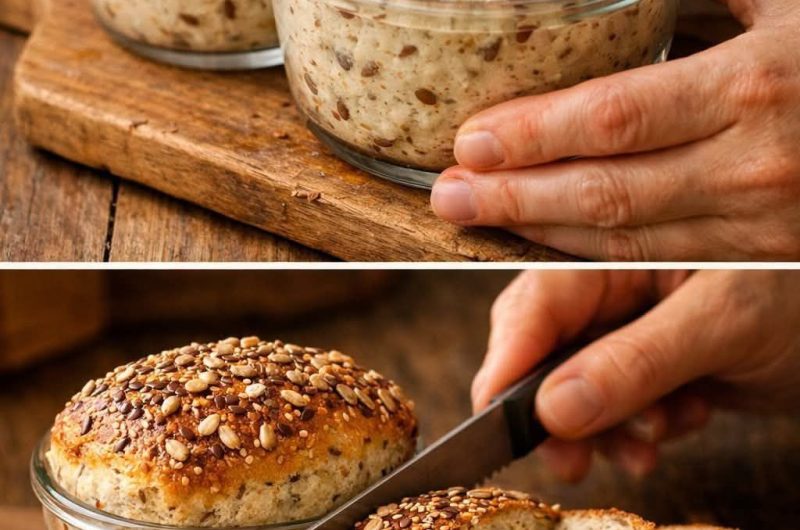
The jar method simplifies everything. You mix, ferment, and observe the dough in one container, reducing mess and making the process easier to manage.
DETAILED INGREDIENT ANALYSIS
Flour (3 cups):
Flour contains proteins called glutenin and gliadin. When combined with water, these proteins link together to form gluten. Gluten is what traps gas and gives bread its structure.
Using bread flour results in a stronger, chewier loaf because it contains more protein. All-purpose flour produces a softer loaf. Both are suitable.
You may also mix in a small portion of whole wheat flour, but too much can make the bread dense.
Water (1½ cups):
Water activates everything in the dough. It hydrates the flour, dissolves salt, and enables yeast activity.
This recipe uses relatively high hydration. That means the dough will be sticky and loose, but this is necessary for achieving an open crumb with large air pockets.
Lower hydration creates tighter, denser bread. Higher hydration creates lighter, more open bread but is harder to handle.
Yeast (½ teaspoon):
A small amount of yeast is intentional. Since the dough rests for many hours, the yeast has enough time to multiply and ferment slowly.
Slow fermentation creates better flavor than fast rising.
Too much yeast will cause rapid fermentation, leading to less flavor and possible over-proofing.
Salt (1½ teaspoons):
Salt has three roles:
It strengthens gluten
It enhances flavor
It slows down yeast activity
Without salt, the dough would ferment too quickly and taste bland.
Seeds (¼ to ½ cup):
Seeds bring both texture and complexity. Each type behaves differently:
Sunflower seeds add crunch and mild sweetness
Flaxseeds add slight chew and nutritional value
Sesame seeds add a toasted, nutty flavor
Pumpkin seeds provide firmness and richness
Chia seeds absorb water and slightly gel
You can mix seeds based on preference.
Optional sweetener:
A small amount of honey or sugar can help balance flavor and slightly assist yeast activity, but it is not required.
FULL PROCESS BREAKDOWN
STEP 1: MIXING THE DOUGH
Add flour, salt, and seeds into your jar or bowl. Mix thoroughly so seeds are evenly distributed.
In a separate container, combine water and yeast. Stir until yeast dissolves.
Pour the liquid into the dry mixture.
Mix slowly using a spoon or spatula. Scrape all sides and ensure no dry flour remains.
At this stage, the dough will look rough, sticky, and uneven. This is correct.
Do not knead. The structure will develop later.
STEP 2: AUTOLYSE (INITIAL REST)
Cover the container and let it sit for 20 to 30 minutes.
During this phase:
Water fully hydrates the flour
Gluten begins forming naturally
Dough becomes smoother
This step improves elasticity and reduces the need for handling later.
STEP 3: BULK FERMENTATION (LONG RISE)
After the short rest, leave the dough covered at room temperature for 12 to 18 hours.
This is the most important stage in the entire process.
During fermentation:
Yeast consumes sugars and releases carbon dioxide
Gas bubbles expand inside the dough
Gluten stretches and strengthens
Organic acids develop, adding flavor
You will observe:
The dough doubling or tripling in size
A bubbly surface
A soft, airy texture
The dough should look alive and slightly wobbly when moved.
STEP 4: FERMENTATION CONTROL
Understanding timing is essential.
Short fermentation results in weak structure and bland flavor.
Excessively long fermentation may cause the dough to collapse and become overly sticky.
Ideal dough is:
Expanded but still holding shape
Full of bubbles but not liquid-like
Soft but not overly loose
STEP 5: TURNING OUT THE DOUGH
Lightly flour your surface.
Gently release the dough from the container. Do not pull or tear aggressively.
Let gravity help the dough fall out naturally.
The dough will be sticky and delicate. This is a sign of proper hydration.
STEP 6: FOLDING AND PRE-SHAPING
Using floured hands, fold the dough over itself from different sides.
This step adds structure without removing air.
Fold 3 to 4 times only.
Let the dough rest for 10 to 15 minutes.
This rest allows gluten to relax, making shaping easier.
STEP 7: FINAL SHAPING
Shape the dough into a round or oval form.
Create surface tension by gently pulling the outer layer inward.
Do not overwork the dough. Gentle handling preserves air bubbles.
Place onto parchment paper or a floured cloth.
STEP 8: FINAL PROOF
Cover and let the dough rest for 30 to 60 minutes.
This stage allows slight expansion before baking.
The dough should look slightly puffed but not collapsed.
STEP 9: OVEN PREPARATION
Preheat oven to 220°C.
Place a heavy pot inside while heating if available.
The goal is to create a hot, steamy environment.
Steam delays crust formation, allowing maximum expansion.
STEP 10: BAKING
Transfer dough carefully into the hot pot or onto a tray.
Optionally add seeds on top.
Bake covered for 30 minutes.
Then uncover and bake for 10 to 15 minutes.
This two-stage baking allows both expansion and browning.
STEP 11: COOLING
Remove bread and place on a rack.
Let it cool for at least 20 to 30 minutes.
Cooling stabilizes the crumb and improves texture.
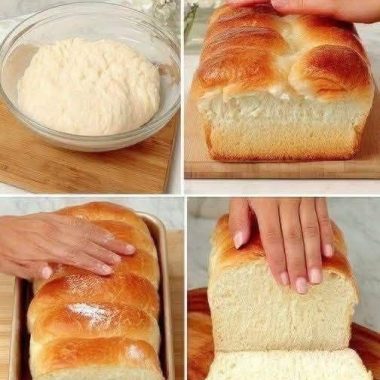
FINAL STRUCTURE AND TEXTURE
The bread should have:
A crisp outer crust
A soft interior with visible air pockets
A slightly chewy bite
A balanced, nutty flavor
DETAILED TROUBLESHOOTING
Bread too dense:
Likely under-fermented or insufficient hydration.
Bread too flat:
Over-proofed or too wet without enough structure.
Crust too thick:
Baked too long or without steam.
Dough too sticky:
Normal for this method; use light flour when handling.
ADVANCED IMPROVEMENTS
Cold fermentation in refrigerator enhances flavor.
Soaking seeds beforehand prevents dryness.
Adjusting hydration changes texture.
Using a baking stone improves heat distribution.
FINAL UNDERSTANDING
This bread teaches patience and observation. It removes physical effort and replaces it with timing and control. Once understood, it becomes one of the most reliable and rewarding bread-making methods.
If you want, I can go even further and give you a professional artisan-level version with exact temperature control, hydration percentages, and bakery techniques.